
Part Number - Part Name
Vehicle Coverage8V3600 - MK8 Coolant Reroute
GTI 2022-2023
Golf R 2022-2023
Audi S3 2022-2023
Congratulations on your purchase of the COBB Tuning xxxxxxxxxxxxxxCoolant Reroute Kit! The following instructions will assist you through the installation process. Please read them BEFORE beginning the install to familiarize yourself with the steps and tools needed. If you feel you cannot properly perform this installation, we HIGHLY recommend you take the vehicle to a qualified and experienced automotive technician.
| Table of Contents |
|---|
Parts List
Coolant Reroute Hose
(2) Constant Tension Clamps 5/8”
(2) 8” Zip Ties
Tools Needed
Sockets
3/8"
3/8" ratchet
3/8" 12" extension3/8" 6" extension3/8" Socket Swivel
3/8" 7mm socket 3/8" 8mm socket(Or Screwdriver for Hose Clamps)
3/8" 10mm socket
3/8" 11mm socket
3/8" 12mm socket
3/8" 13mm socket
3/8" 14mm socket
3/8" 15mm socket
3/8" 16mm socket
3/8" 17mm socket
3/8" 18mm socket
3/8" 19mm socket
3/8" 21mm socket
3/8" 10mm deep socket
3/8" 12mm deep socket
3/8" 13mm deep socket
3/8" 14mm deep socket
3/8" 15mm deep socket
3/8" 17mm deep socket
3/8" 14mm swivel socket
3/8" T20 Torx Bit
3/8" T25 Torx Bit
3/8" T30 Torx Bit
3/8" T40 Torx Bit
3/8" T50 Torx Bit
3/8" E10 inverted Torx
3/8" E12 inverted Torx
3/8" E14 inverted Torx
3/8" E18 inverted Torx
3/8" 4mm Allen Socket
3/8" 5 mm Allen Socket
3/8" 10 mm Allen Socket
1/2"
1/2" ratchet
1/2" breaker bar*
1/2" 16" extension*
1/2" 14mm socket*
1/2" 23mm deep socket
Torque Wrench
Hand Tools
Phillips head screwdriver
Flathead screwdriver
3mm Allen Key
7mm Nut Driver
Trim removal tool
Pick
Needlenose pliers
Channel Lock Pliers
Deadblow Hammer
Misc.
14mm offset wrench
Oxygen Sensor Wrench
Hose cutterFlat head screwdriver
Hose Clamp Pliers or traditional pliers
Misc.
Drain pan
Spill-Free coolant bleeding funnel
Wrenches
8mm Ratcheting combination wrench
10mm combination wrench
11mm combination wrench
12mm combination wrench
13mm combination wrench
14mm combination wrench
15mm combination wrench
16mm combination wrench
17mm combination wrench
18mm combination wrench
19mm combination wrench
21mm combination wrench
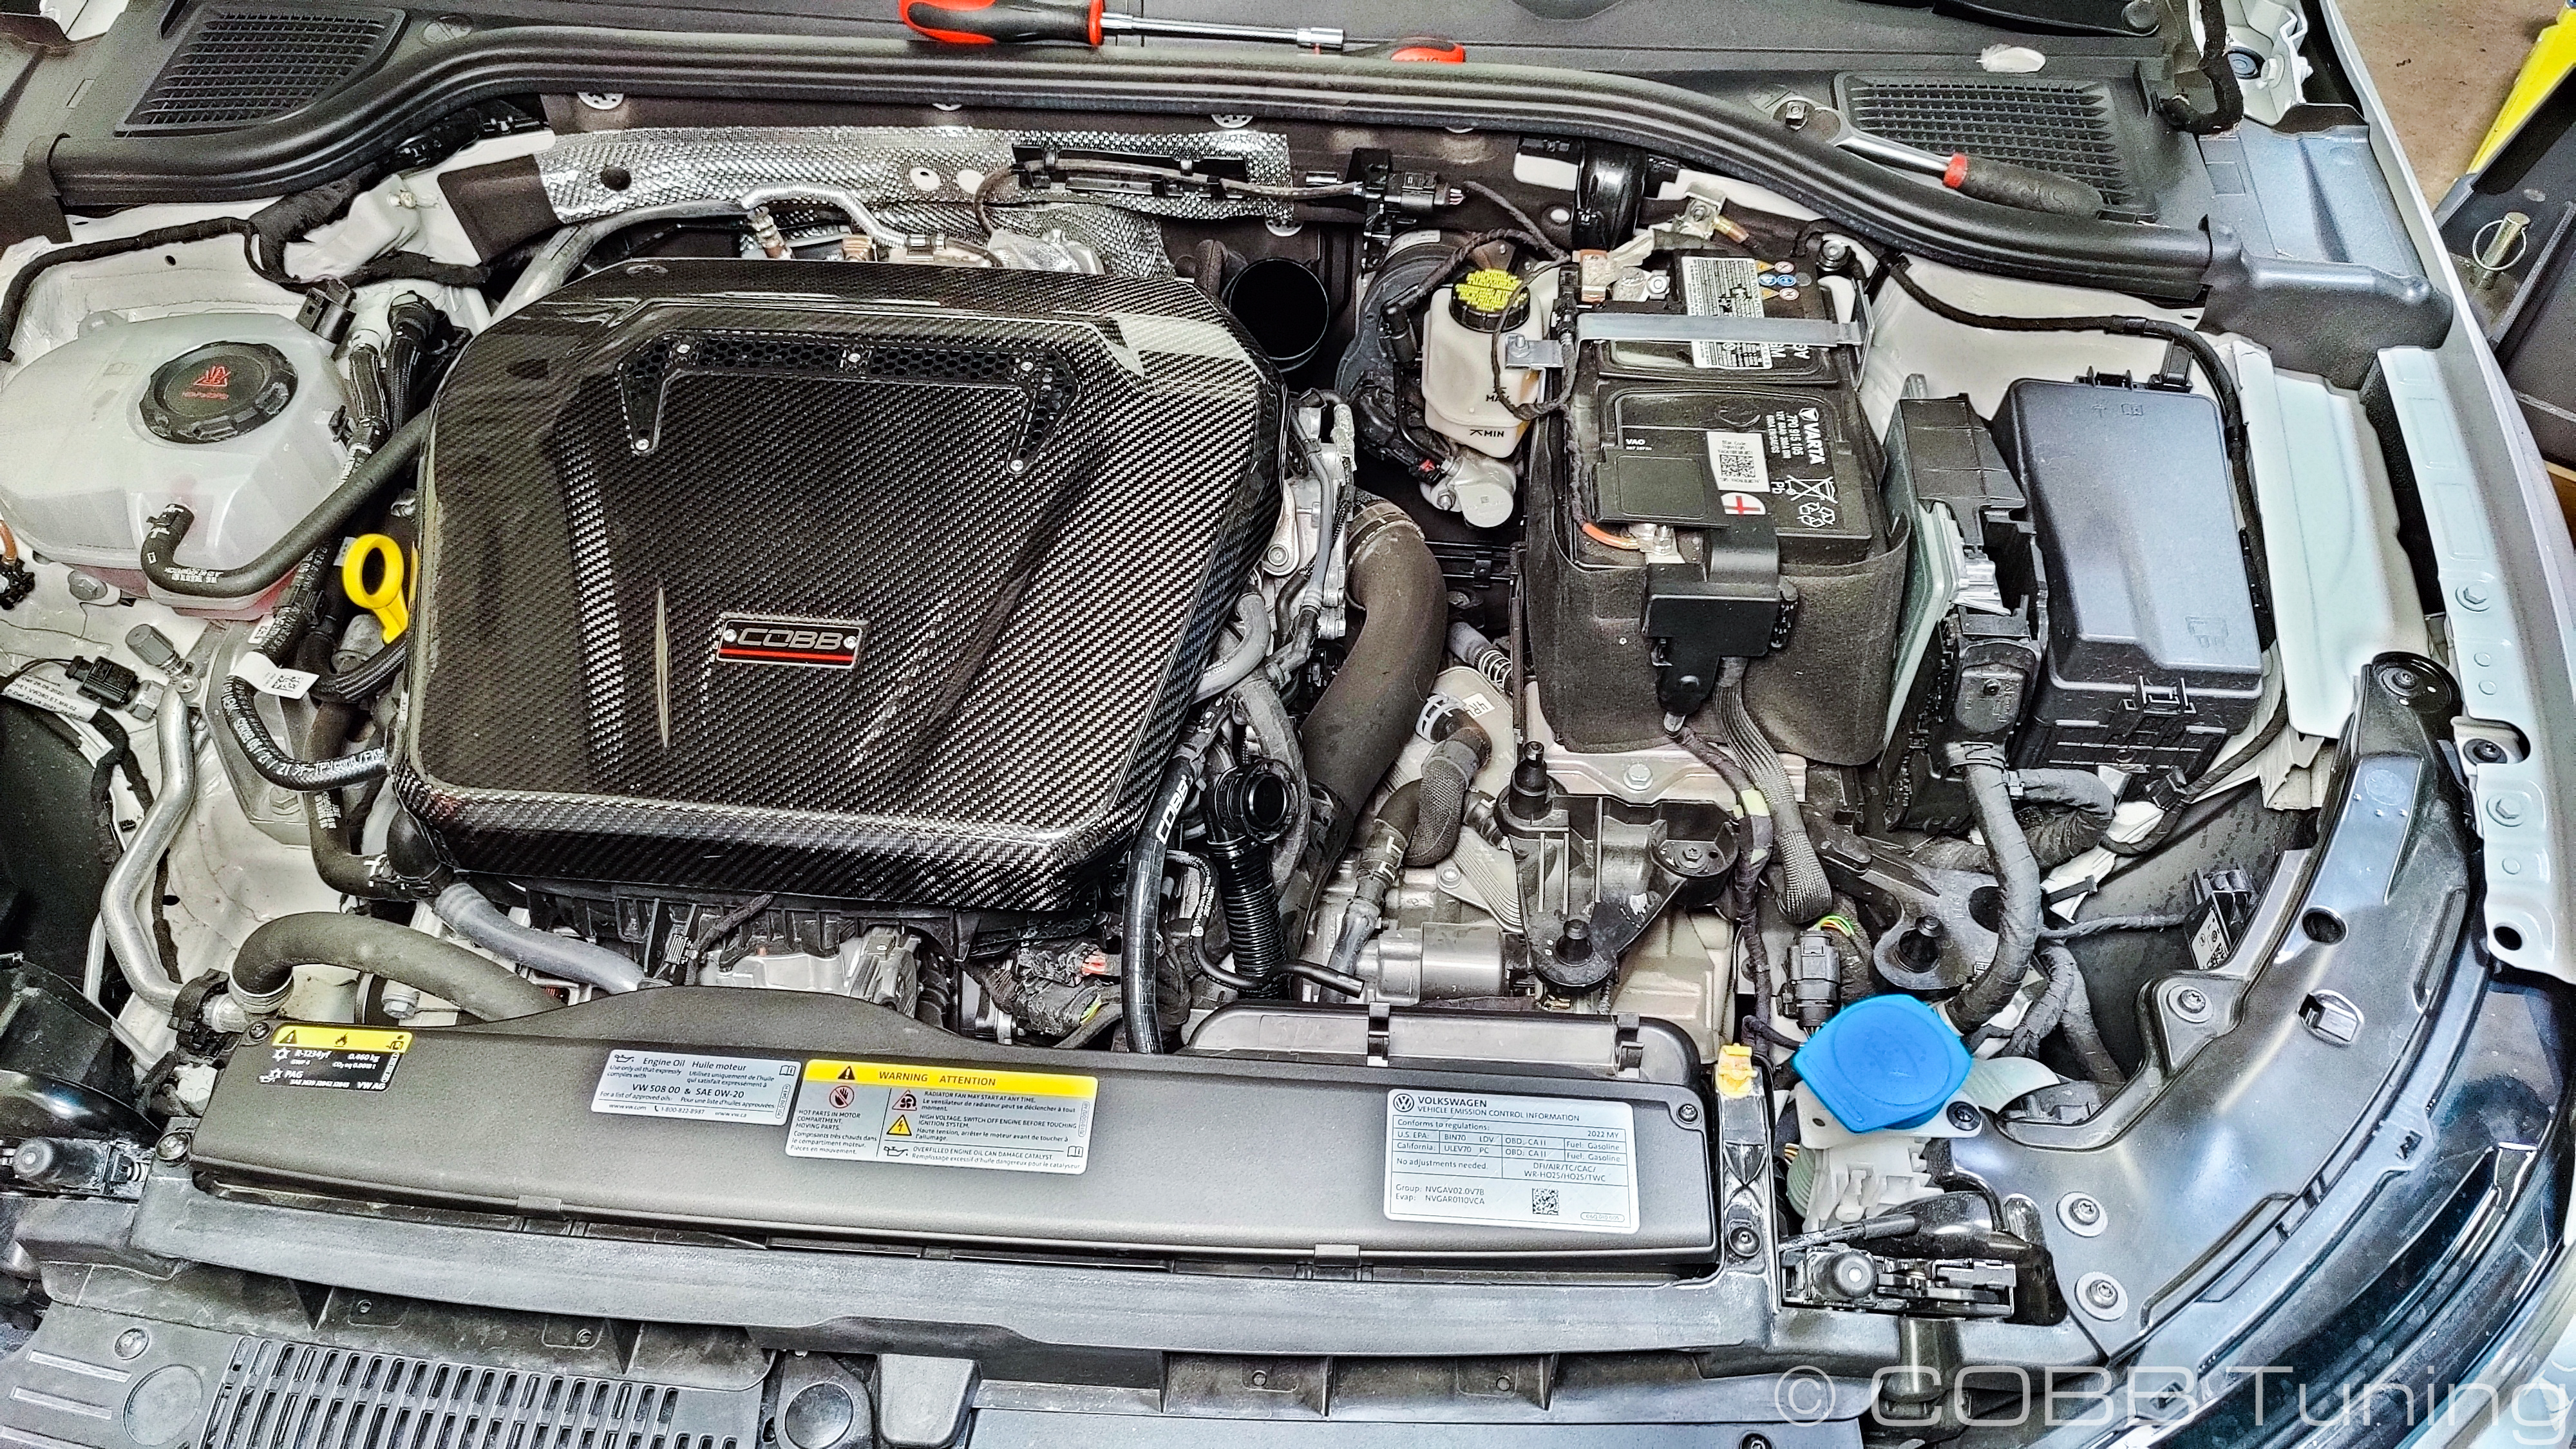
Remove the OEM Volkswagen Intake
Before removal of factory intake, it is recommended to remove the engine cover by pulling it off of its grommets.
Inspect the new components included with the COBB kit. If anything appears out of place, please contact COBB immediately and do not proceed with the installation.
Park your car in a flat, level area.
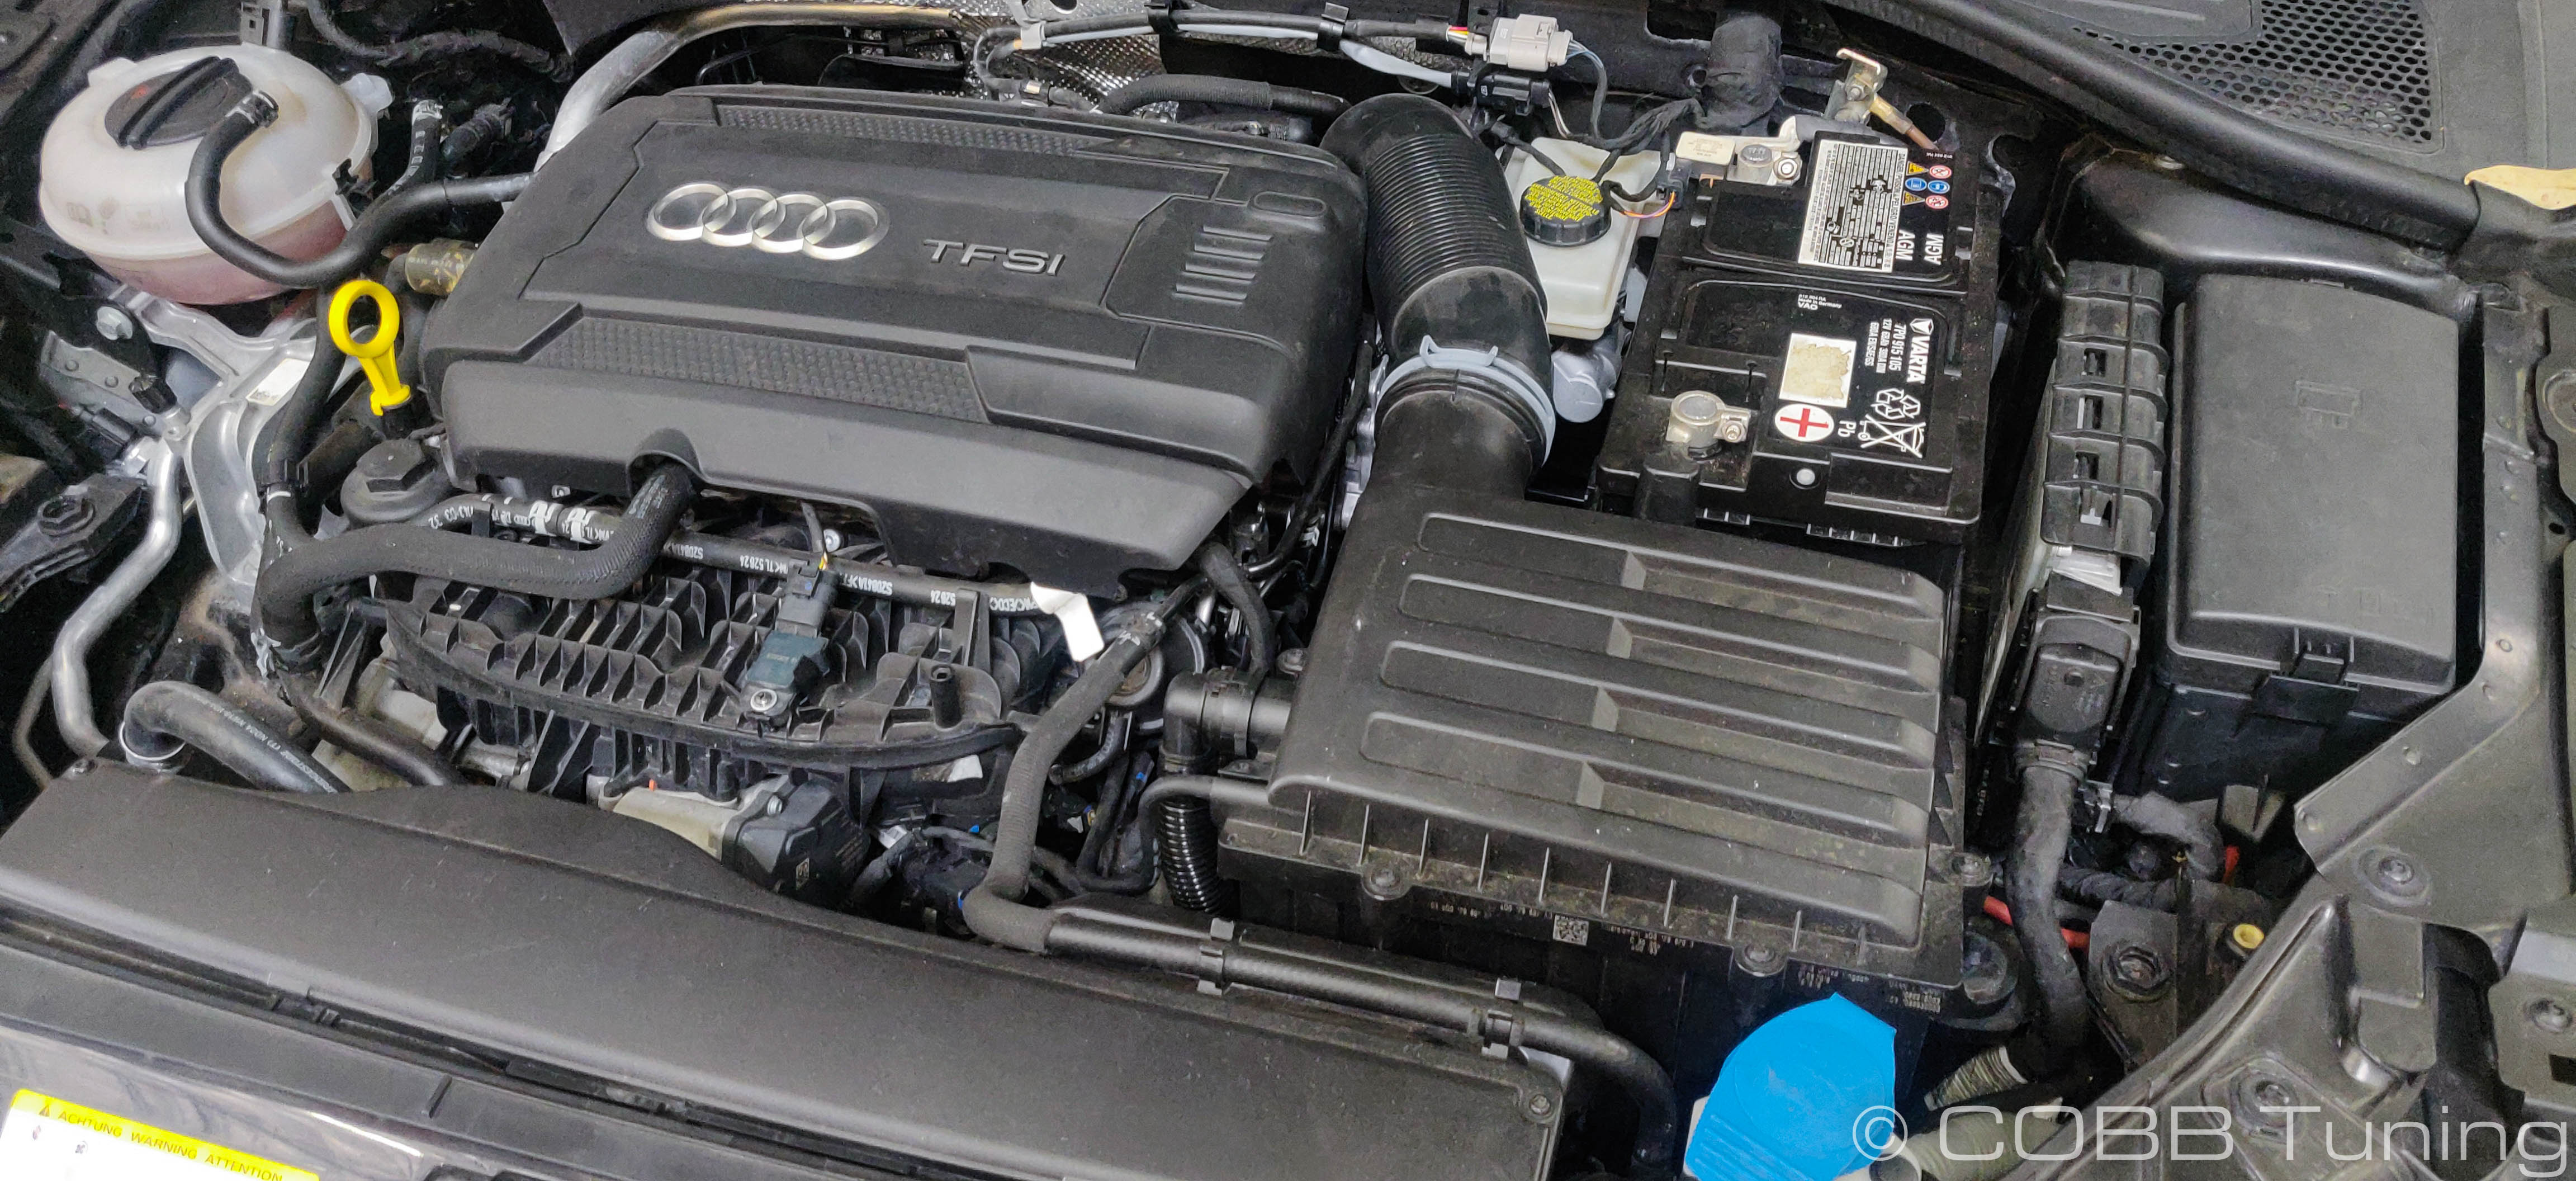
Using the hose clamp pliers, take off the clamp holding the stock intake tube to the turbo. Then pull the tube off of the turbo inlet housing.
Take a T20 Torx screwdriver and remove the screws holding the stock snorkel in place.

Pull the 1/4" rubber hose off of the stock airbox. This may require some strength! Just be careful not to bust your hand when it finally comes off!
Unclip the air pump from the stock airbox.
Now you should be able to pull the stock airbox and intake tube out of the car by popping the box off of the grommets that hold it in place.
Once the airbox and tube are out of the car, you can remove the stock snorkel.
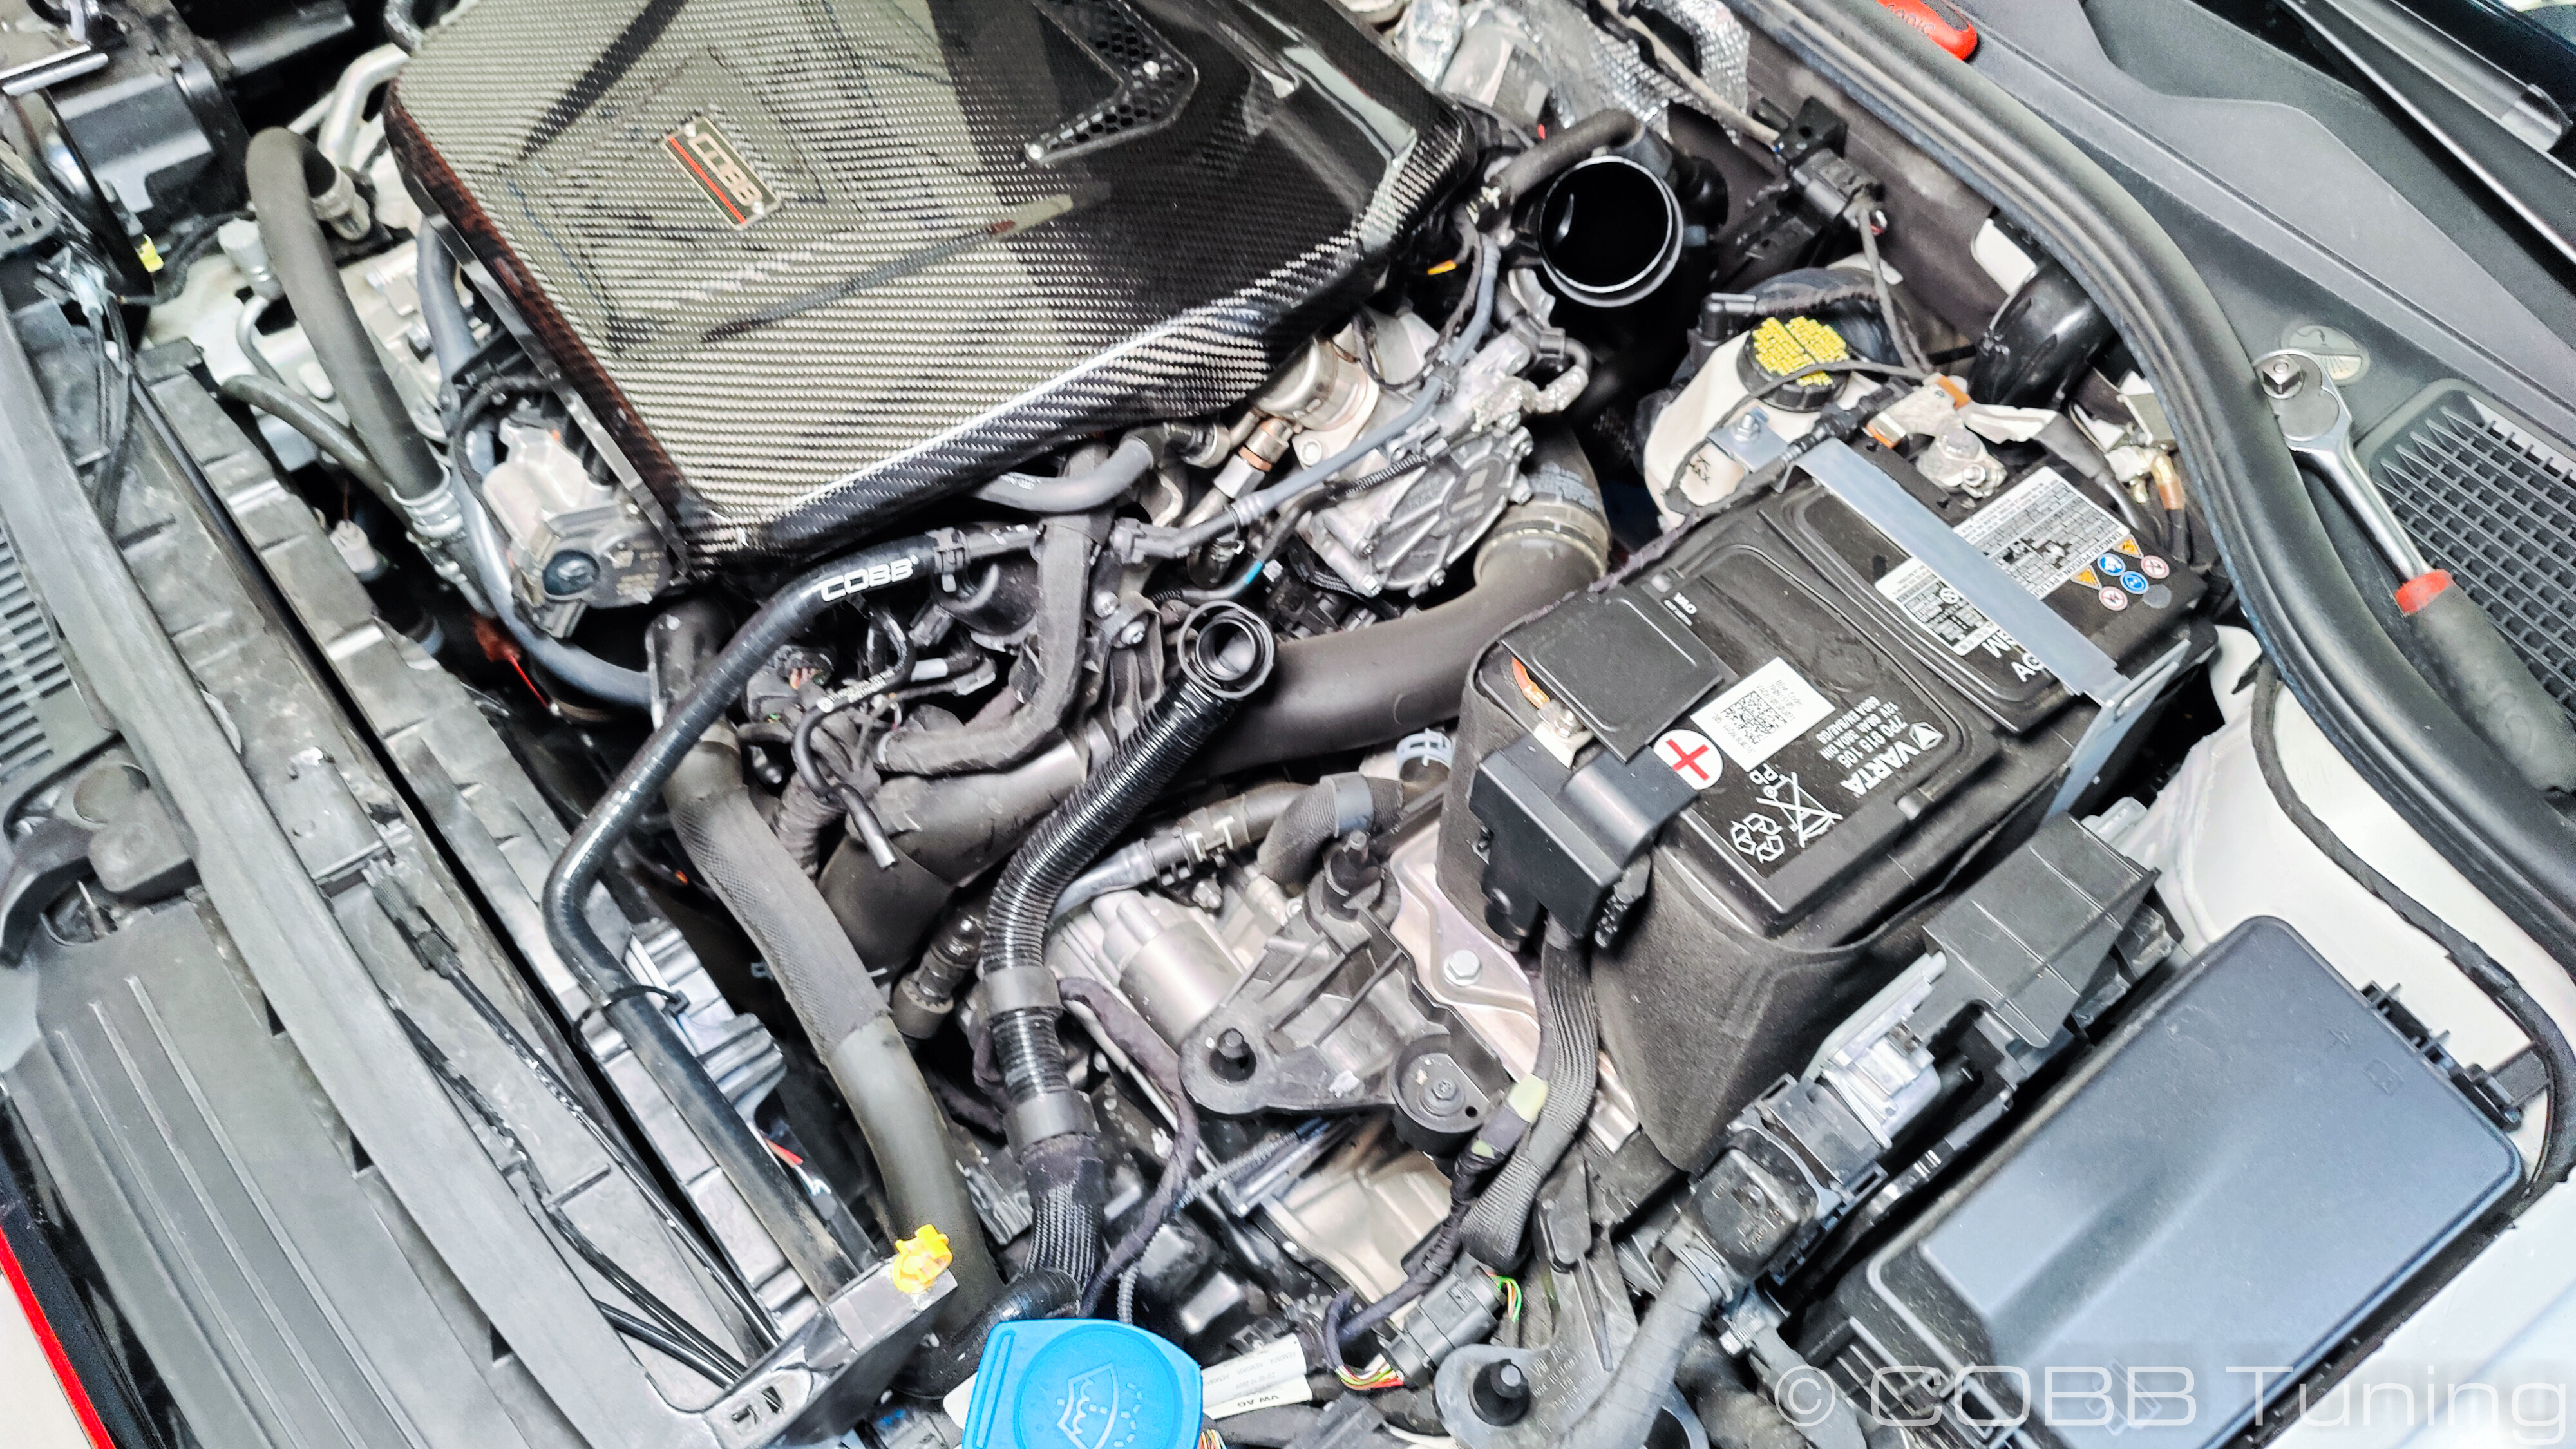
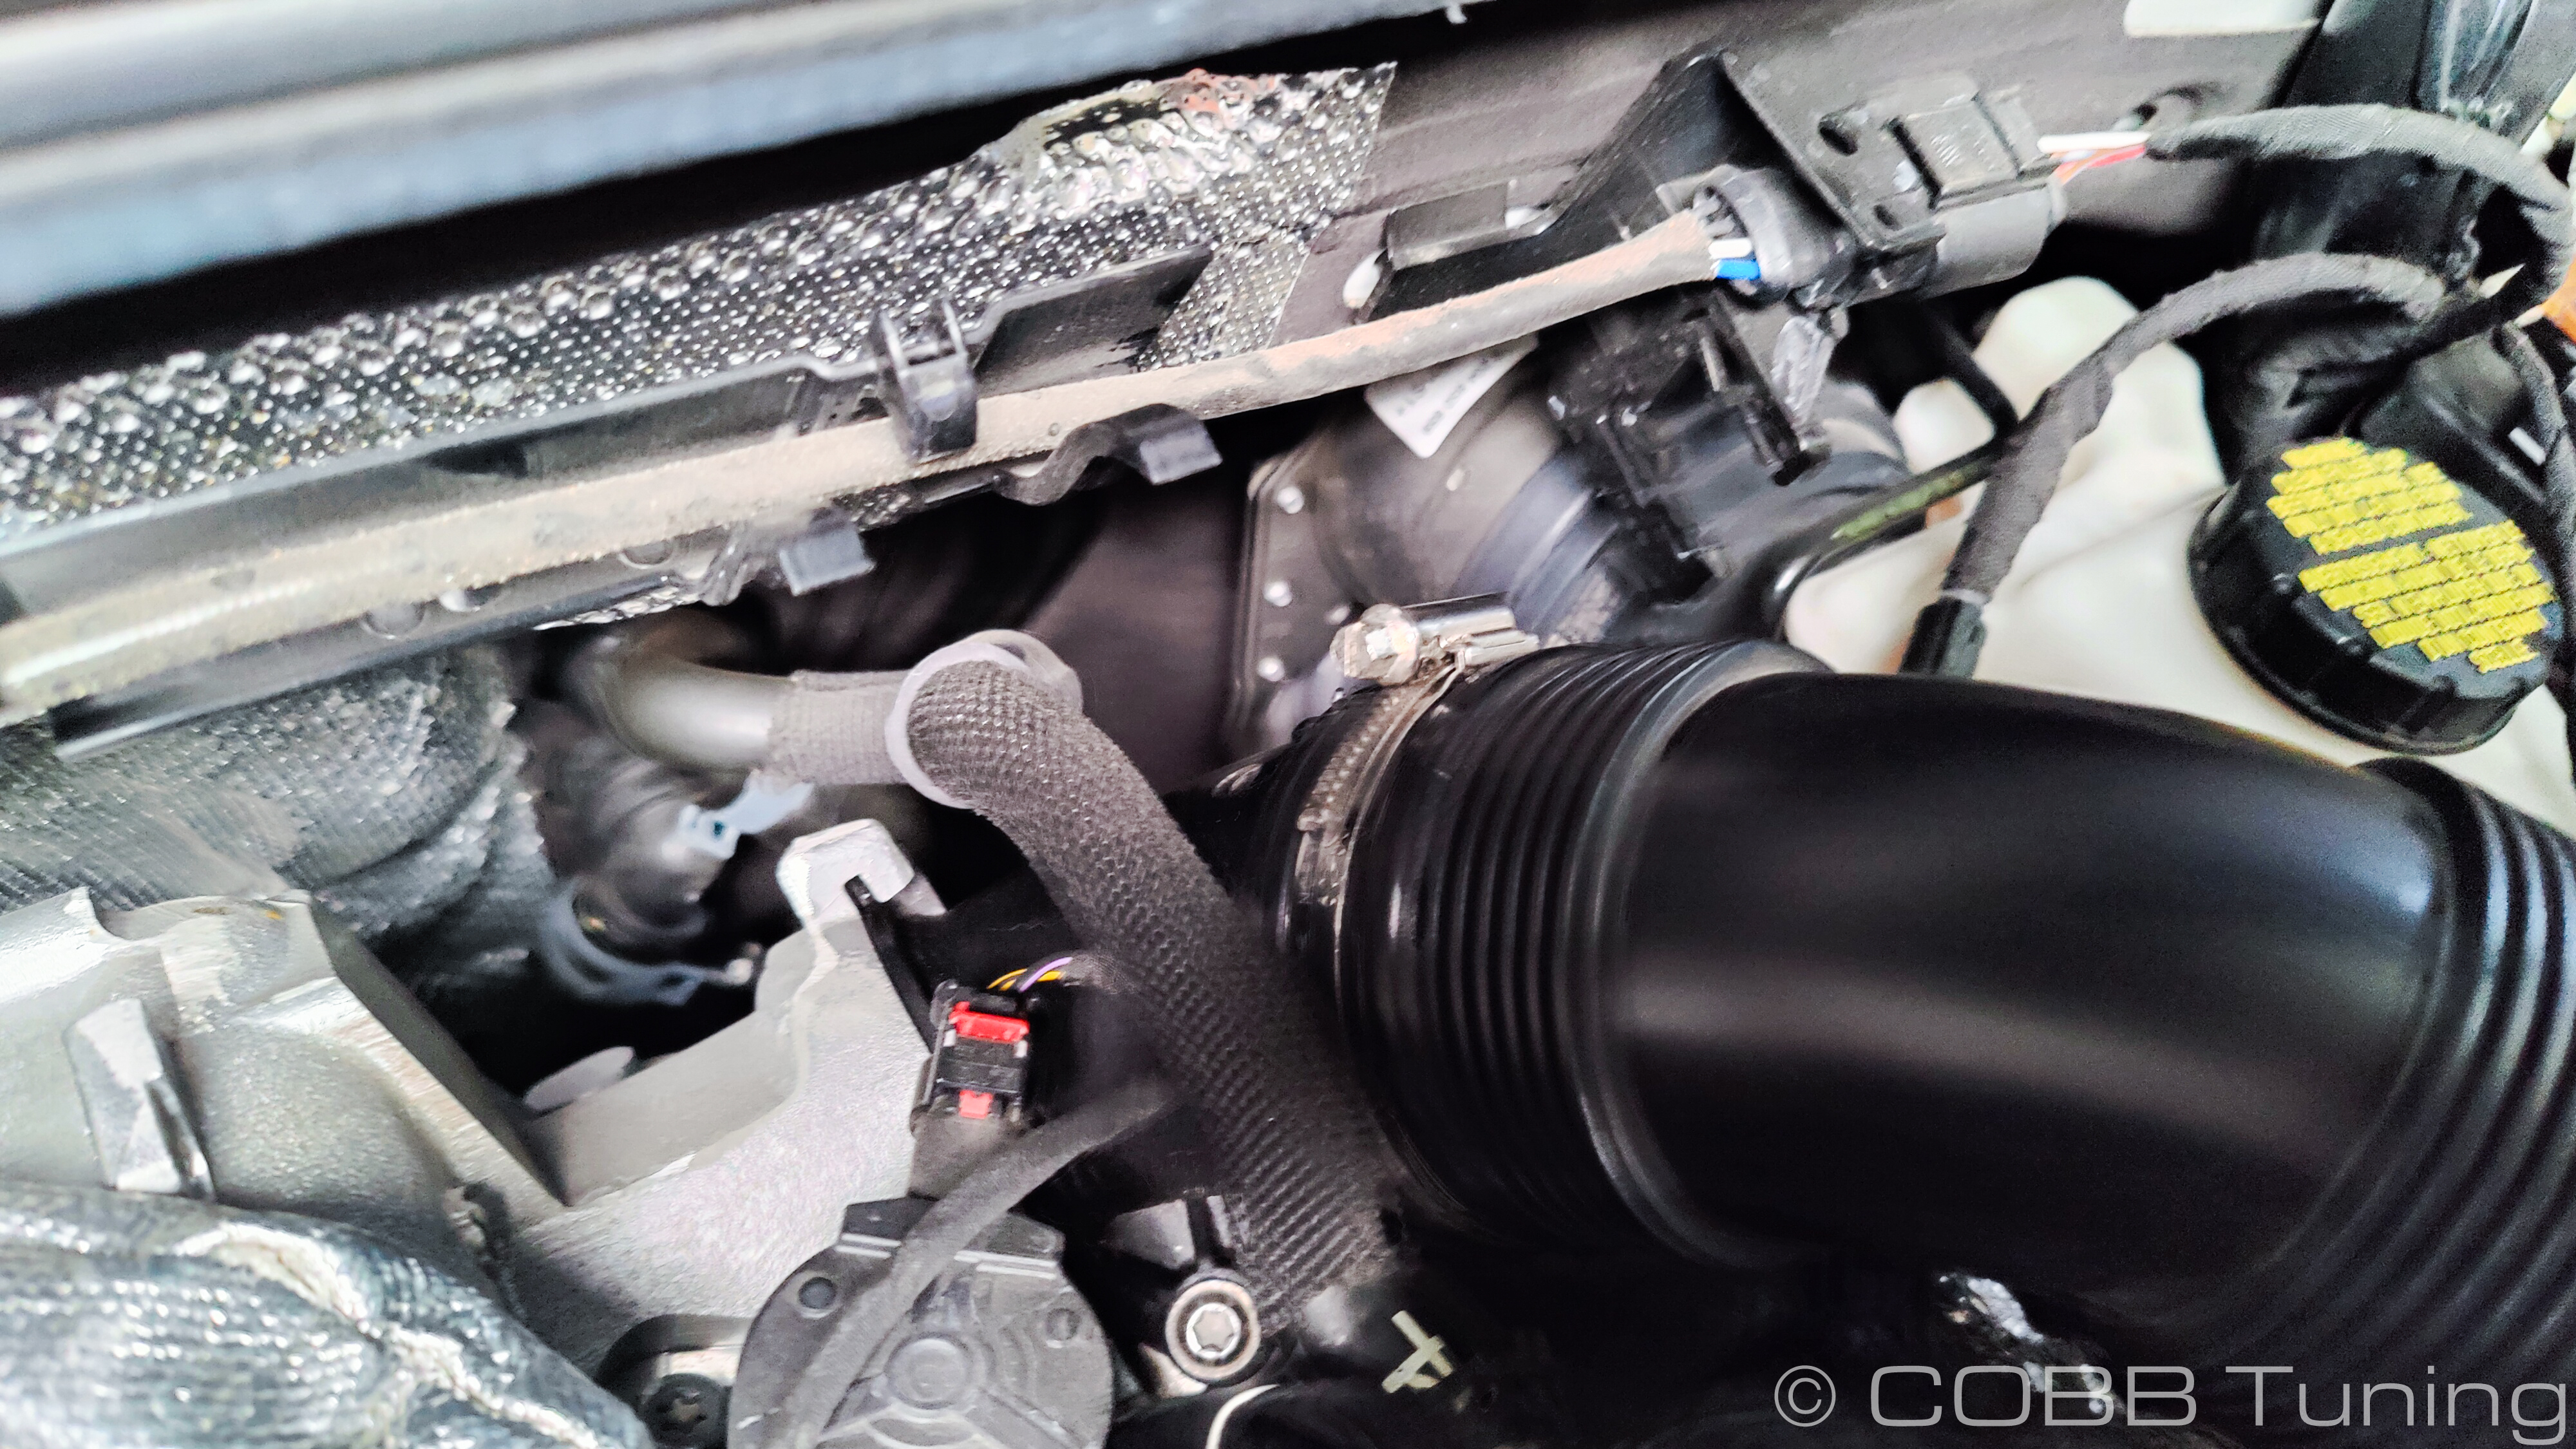
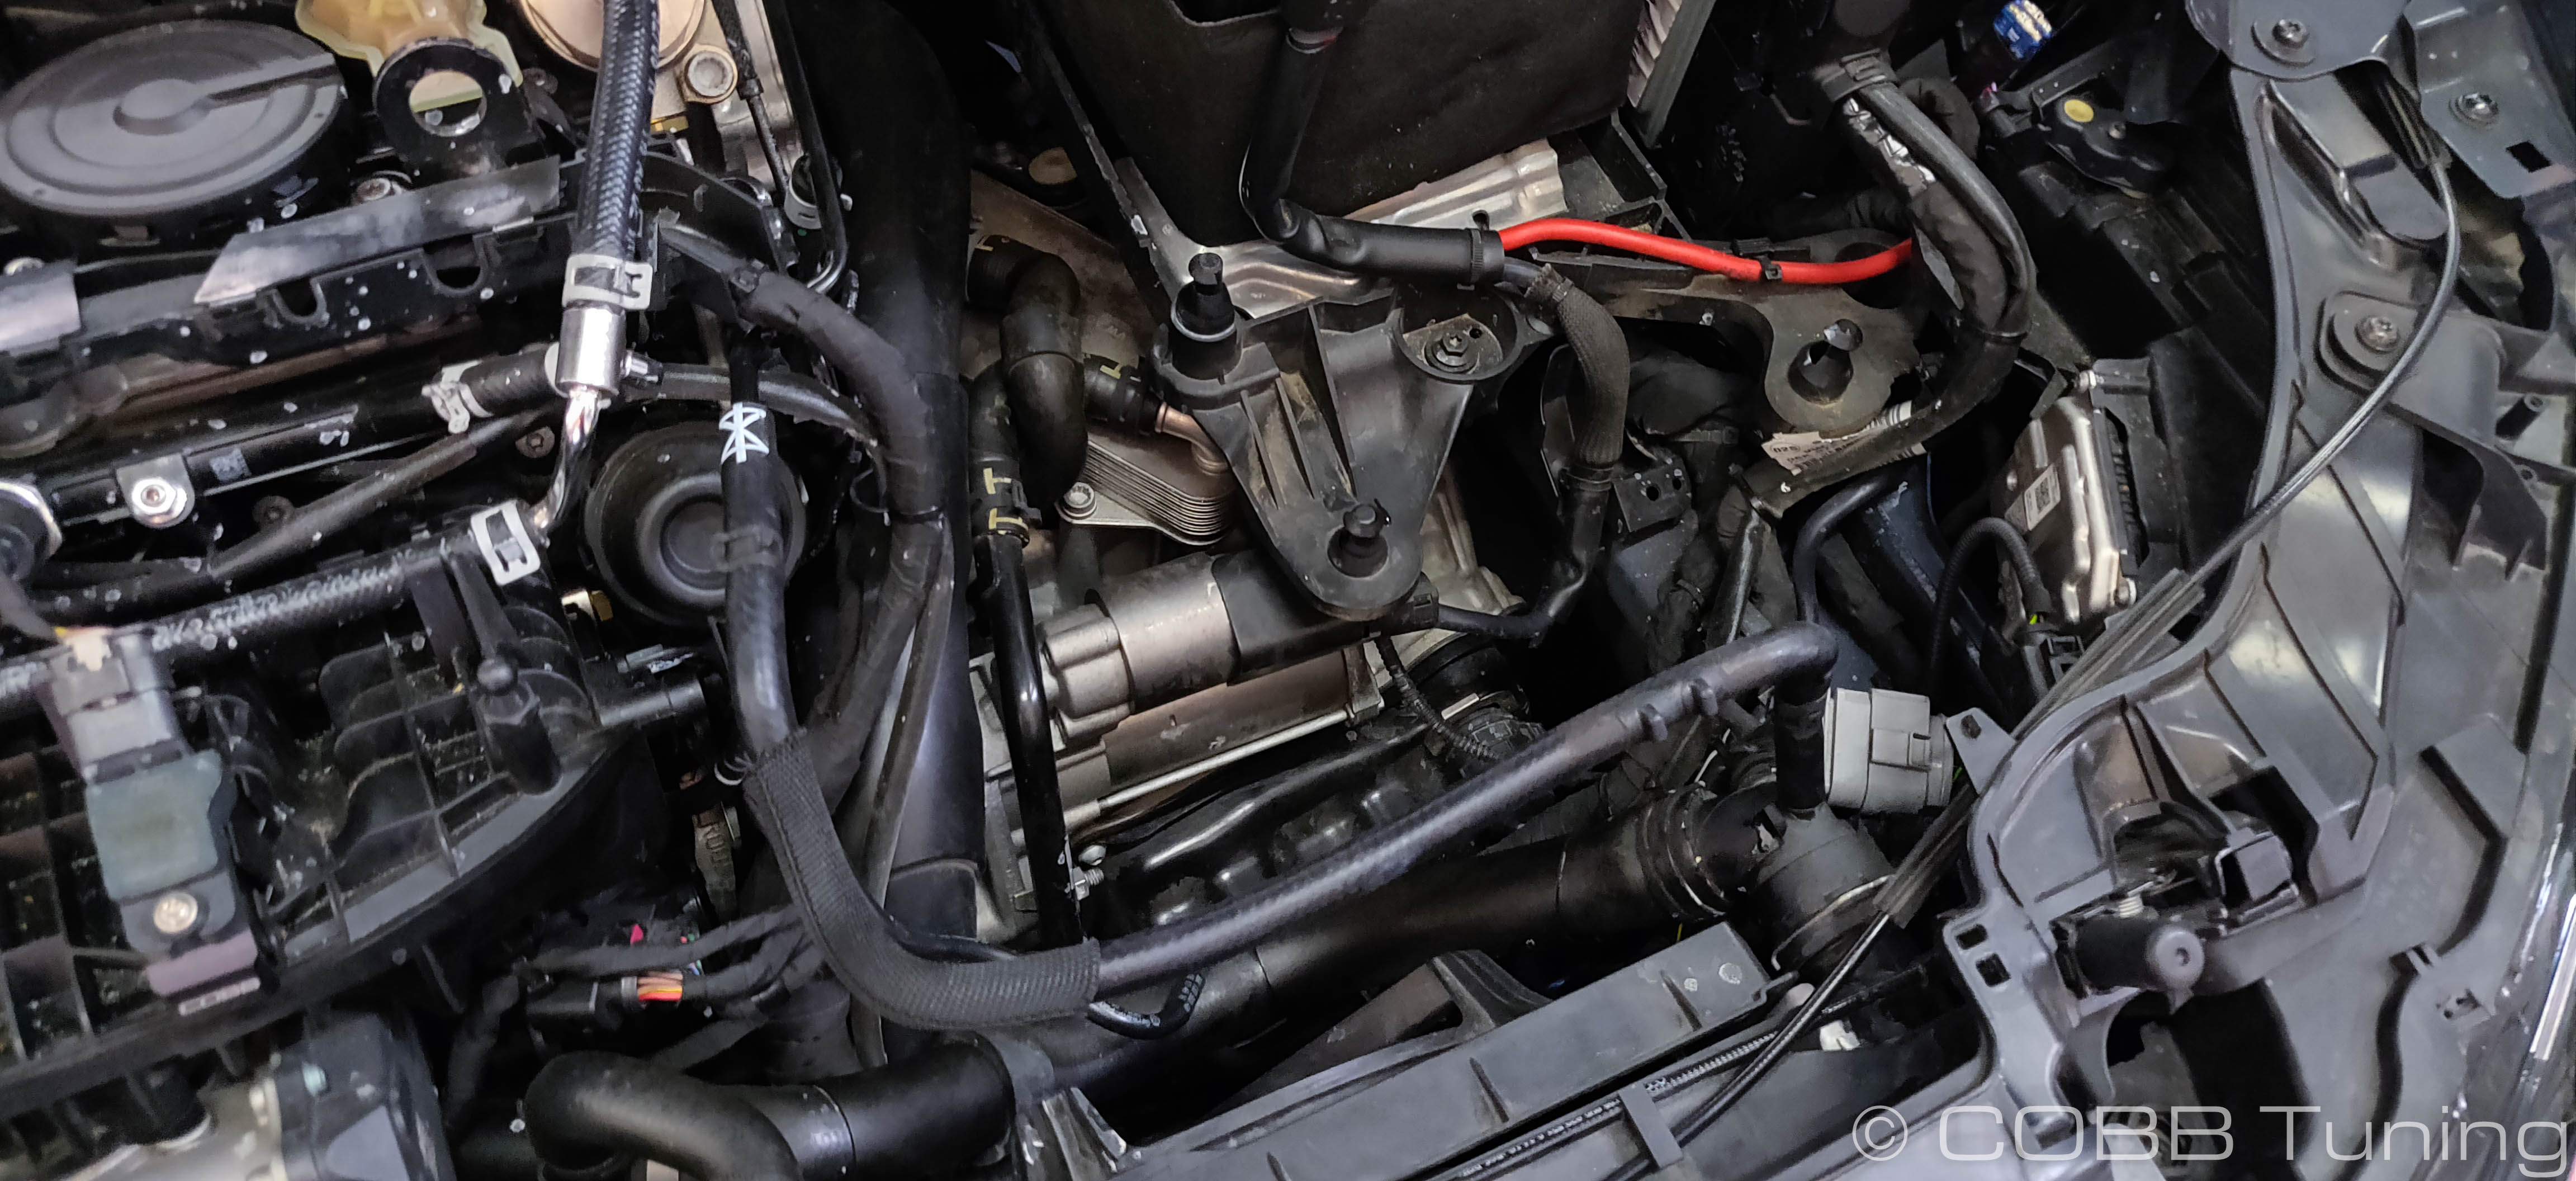
Coolant Hose Change
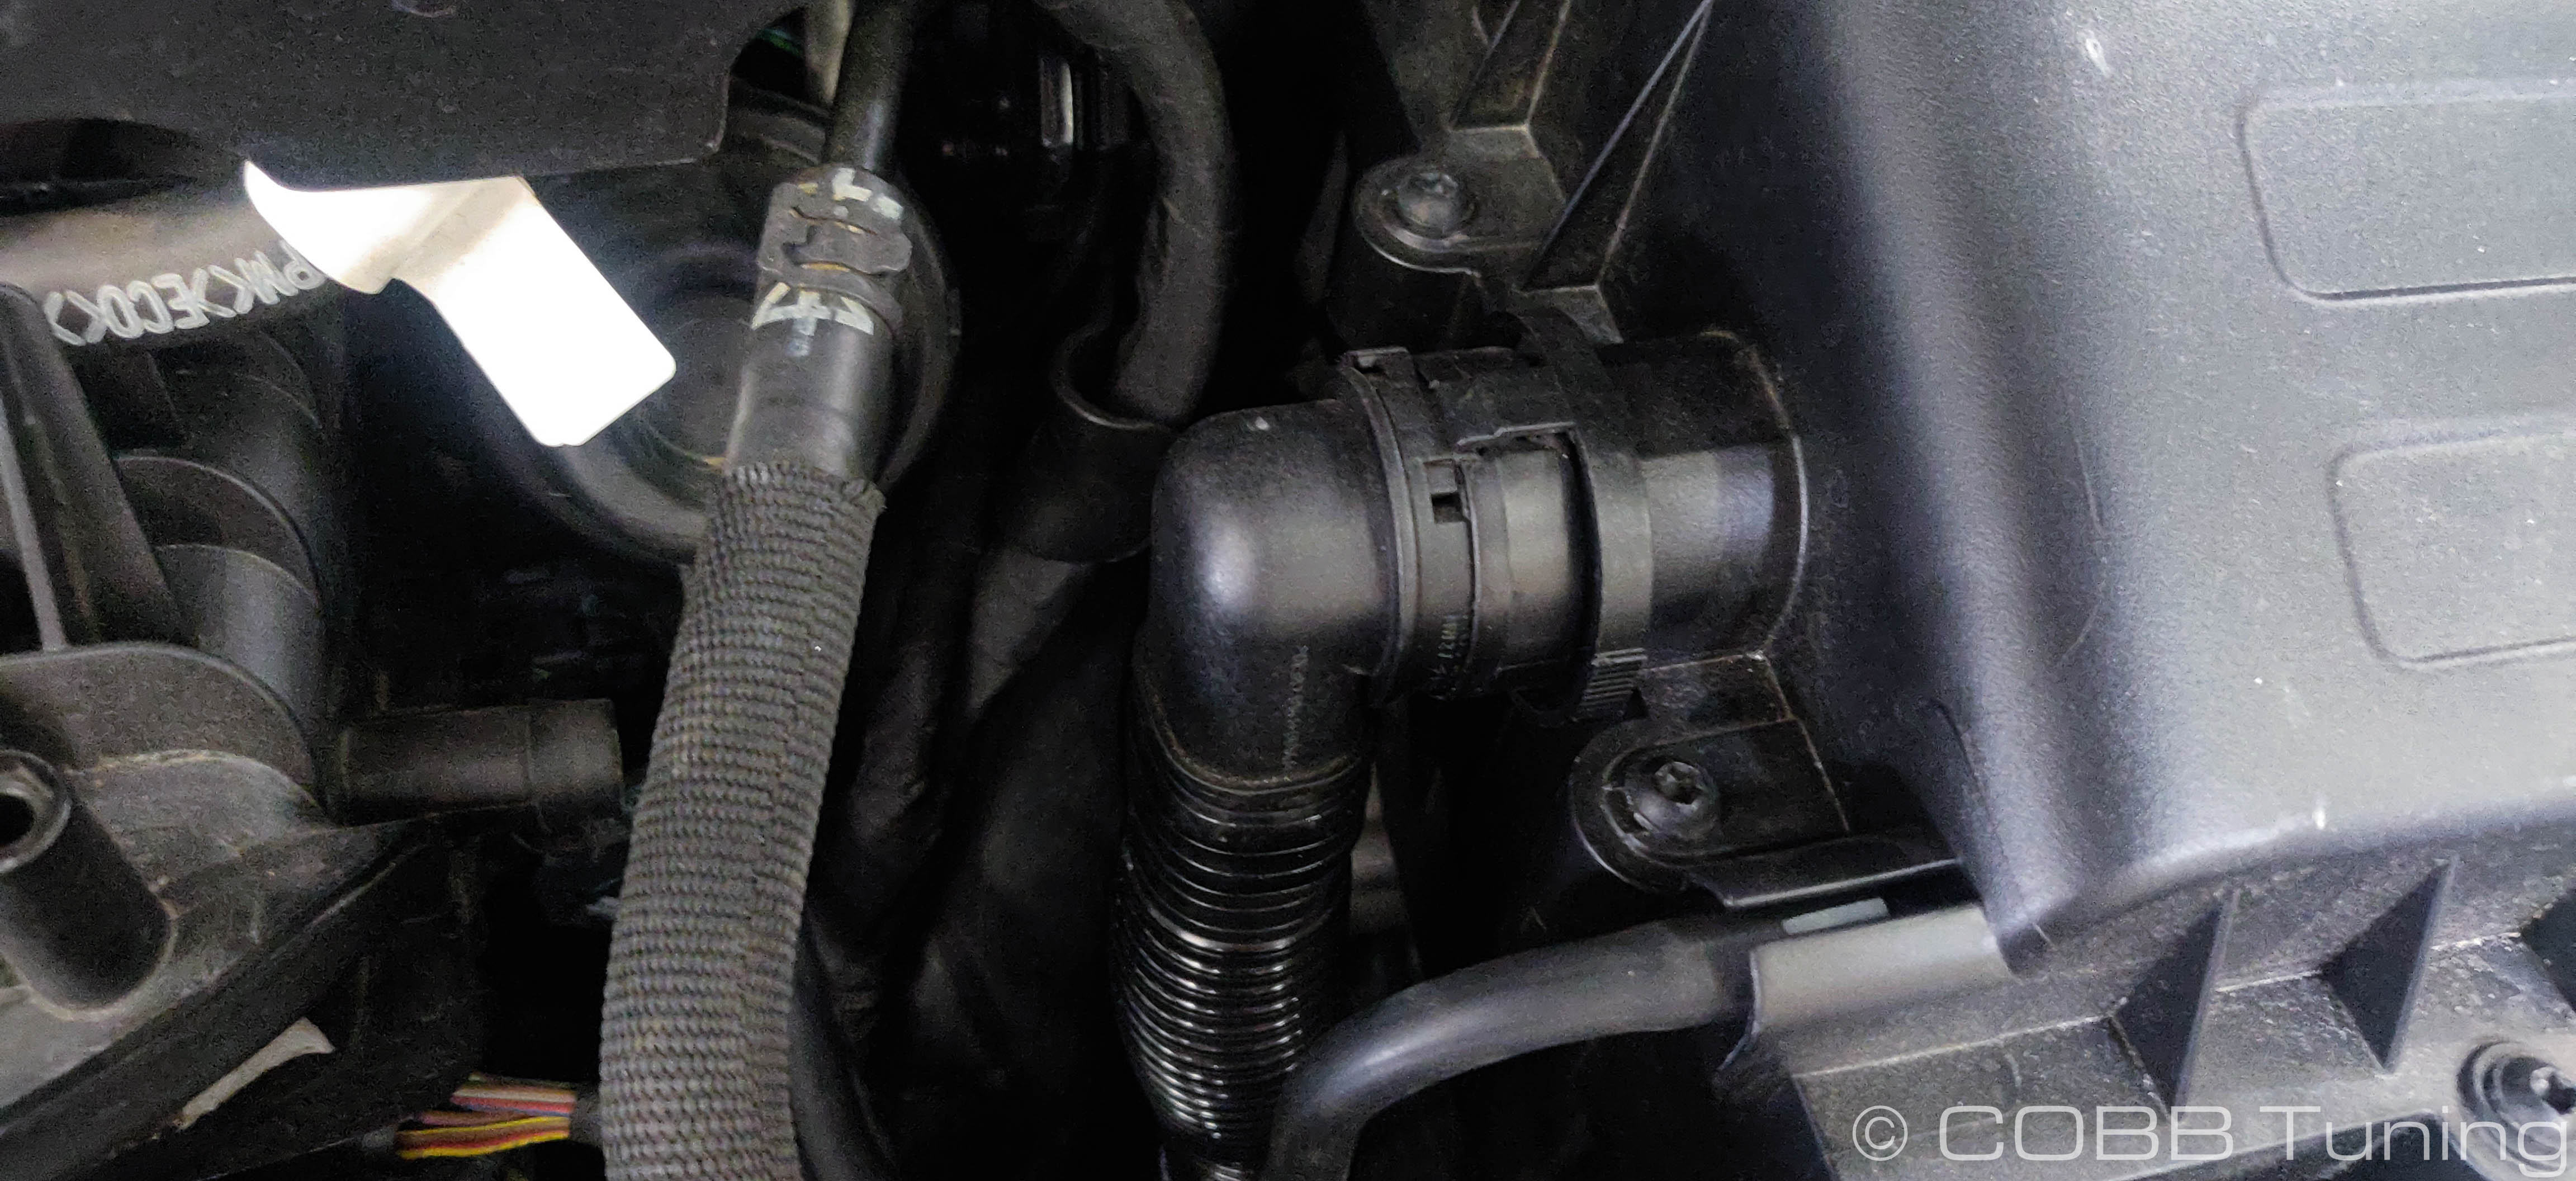
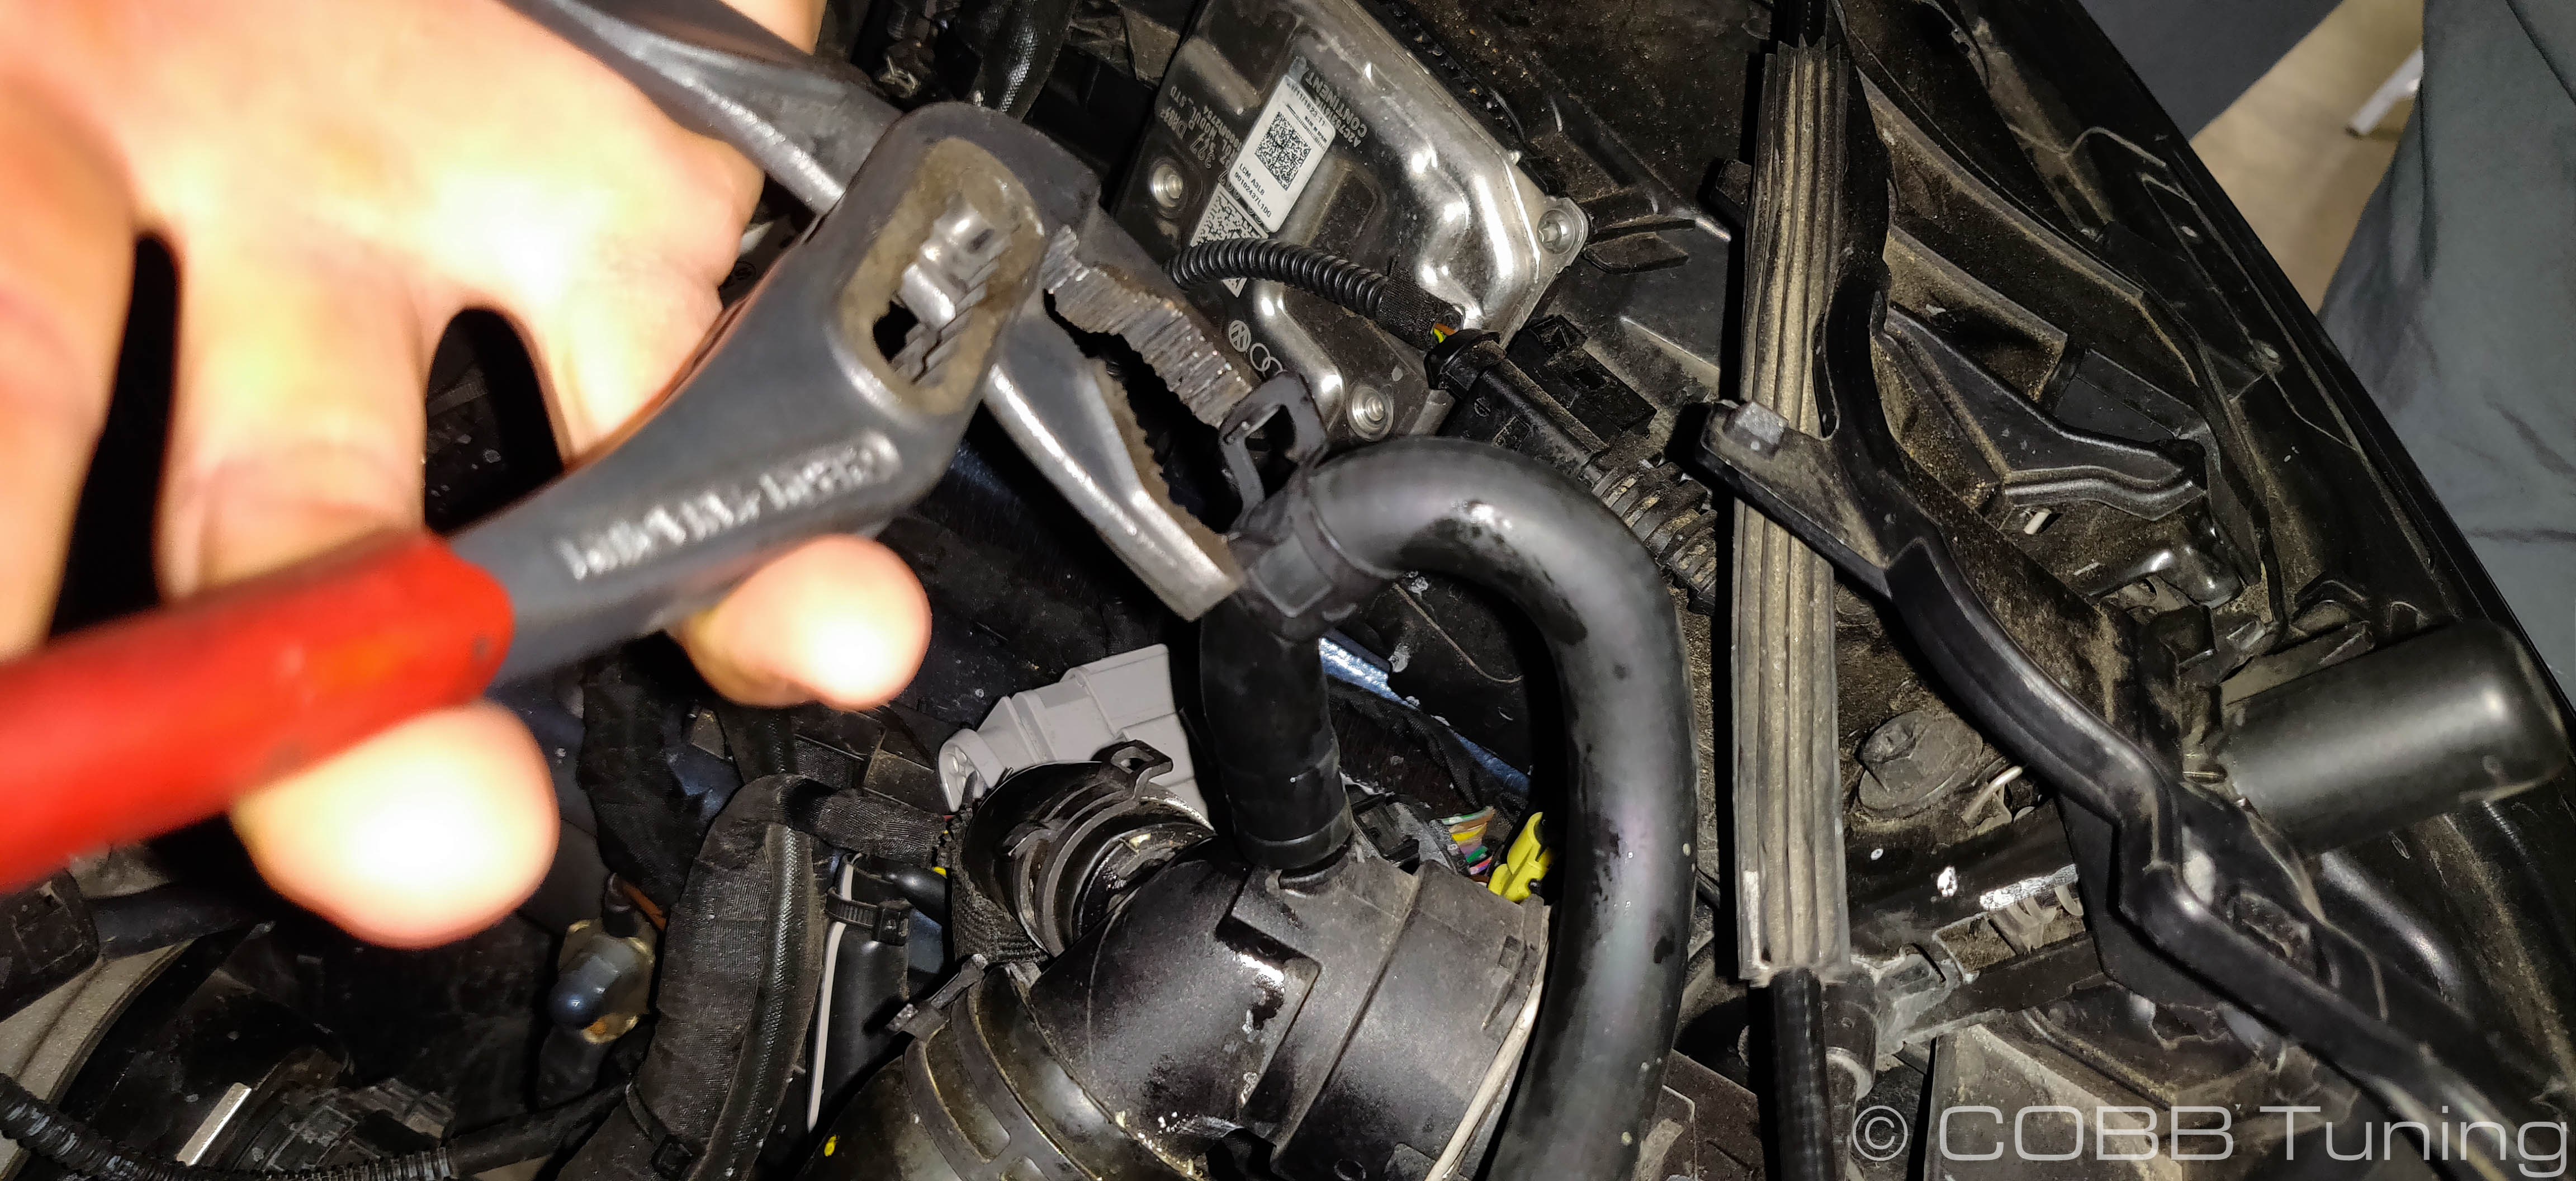
Locate the stock coolant line going from the radiator hose to a metal tube on the engine.
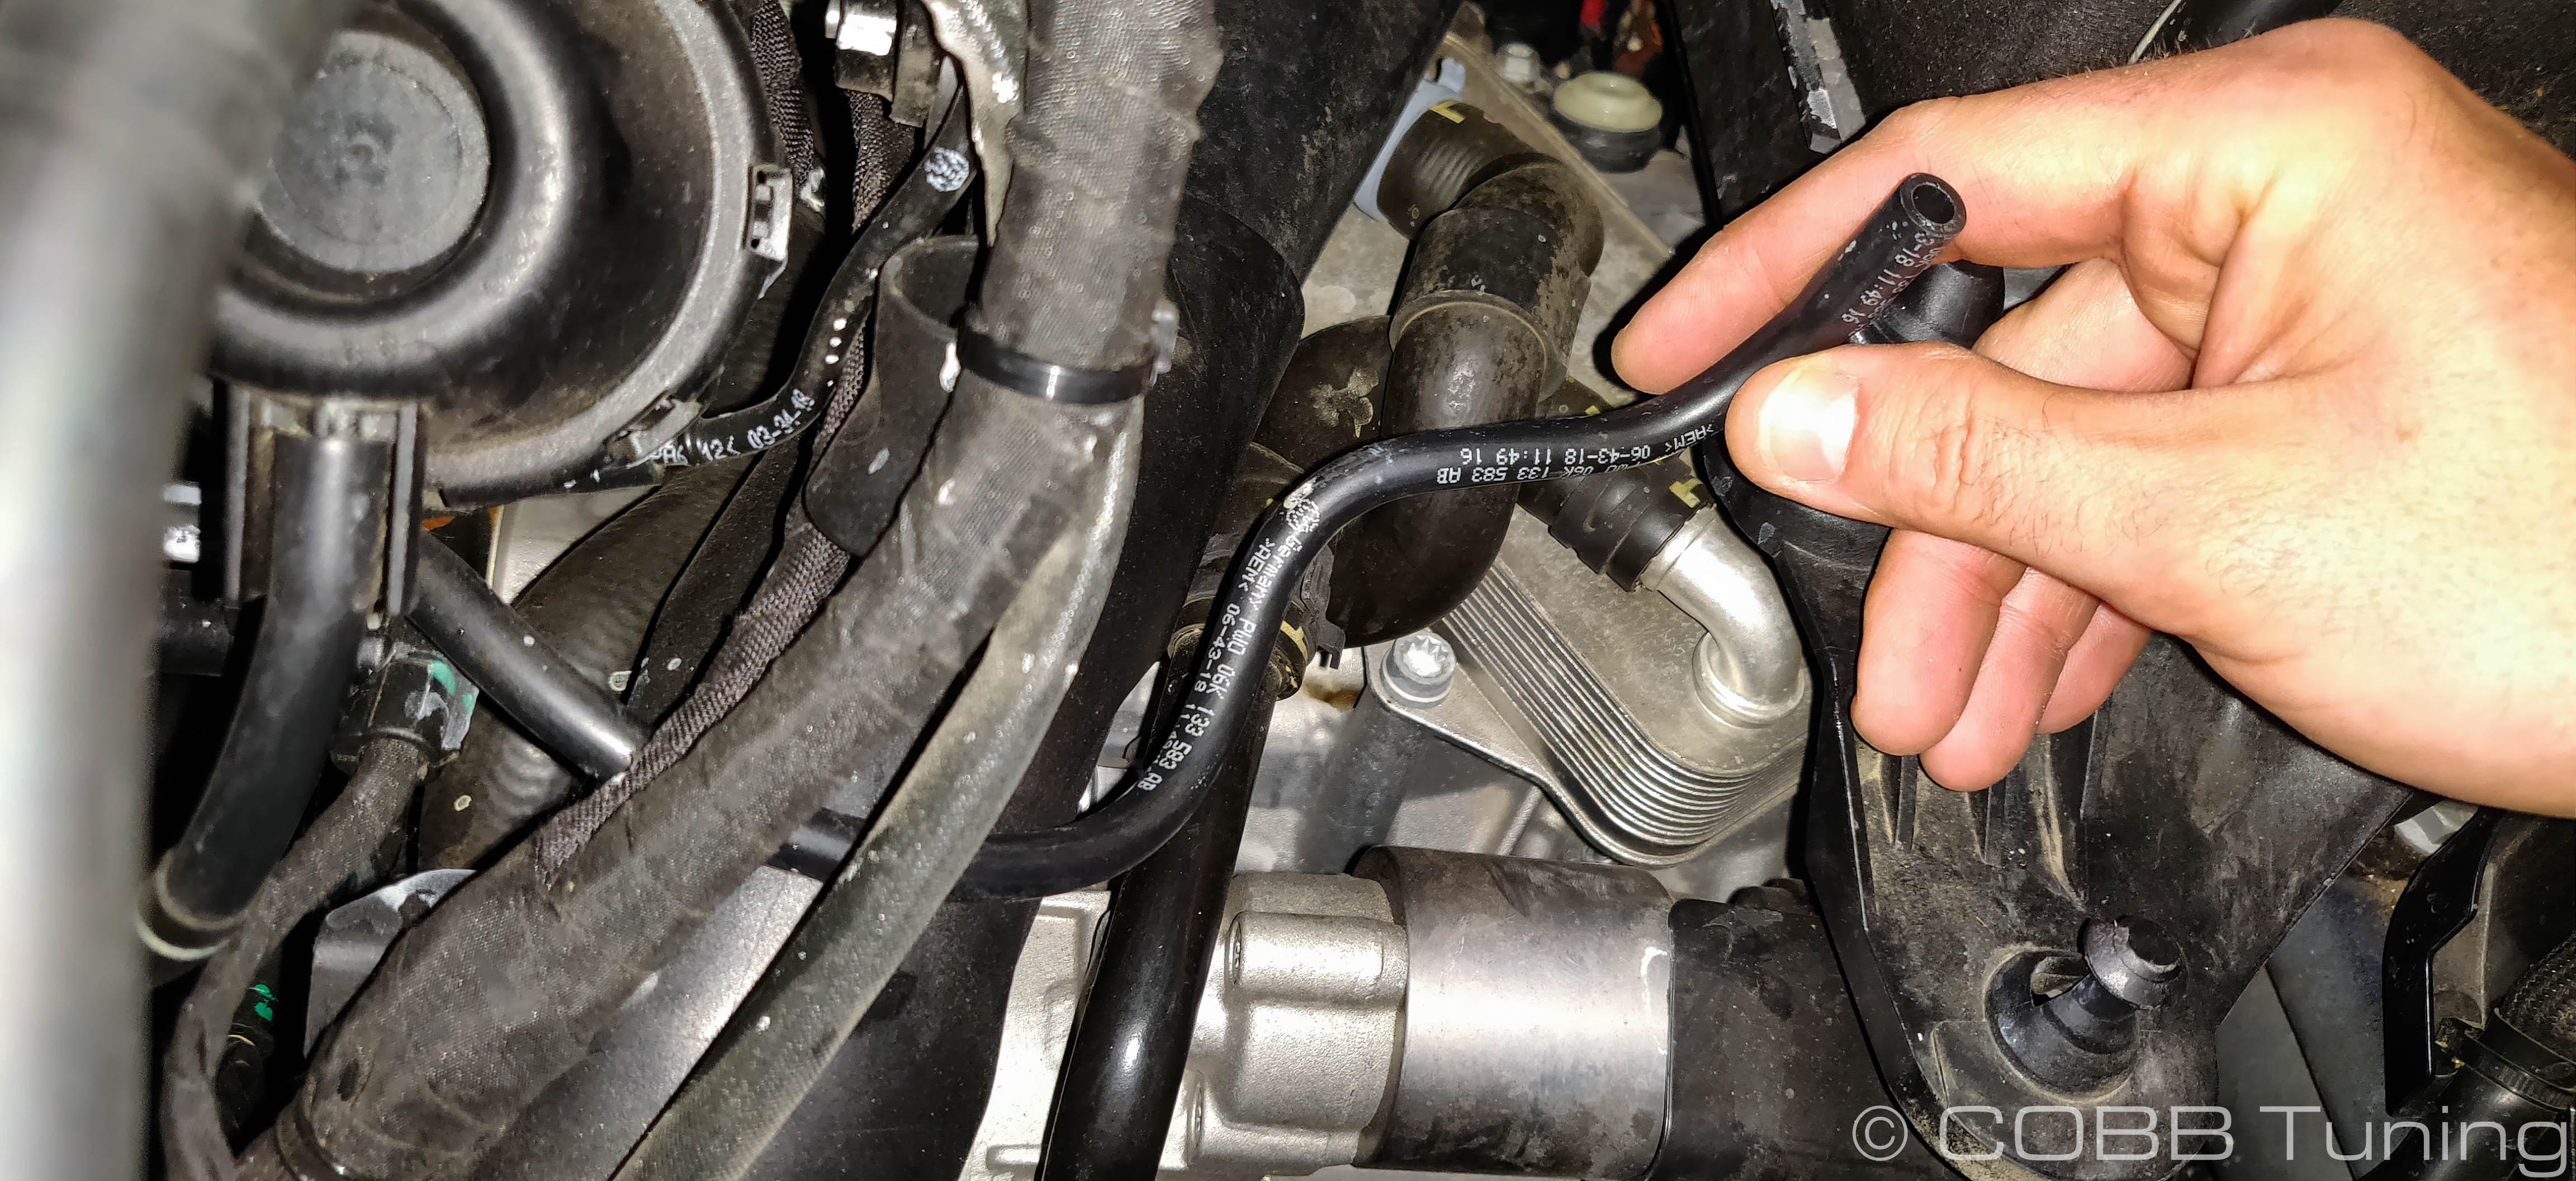
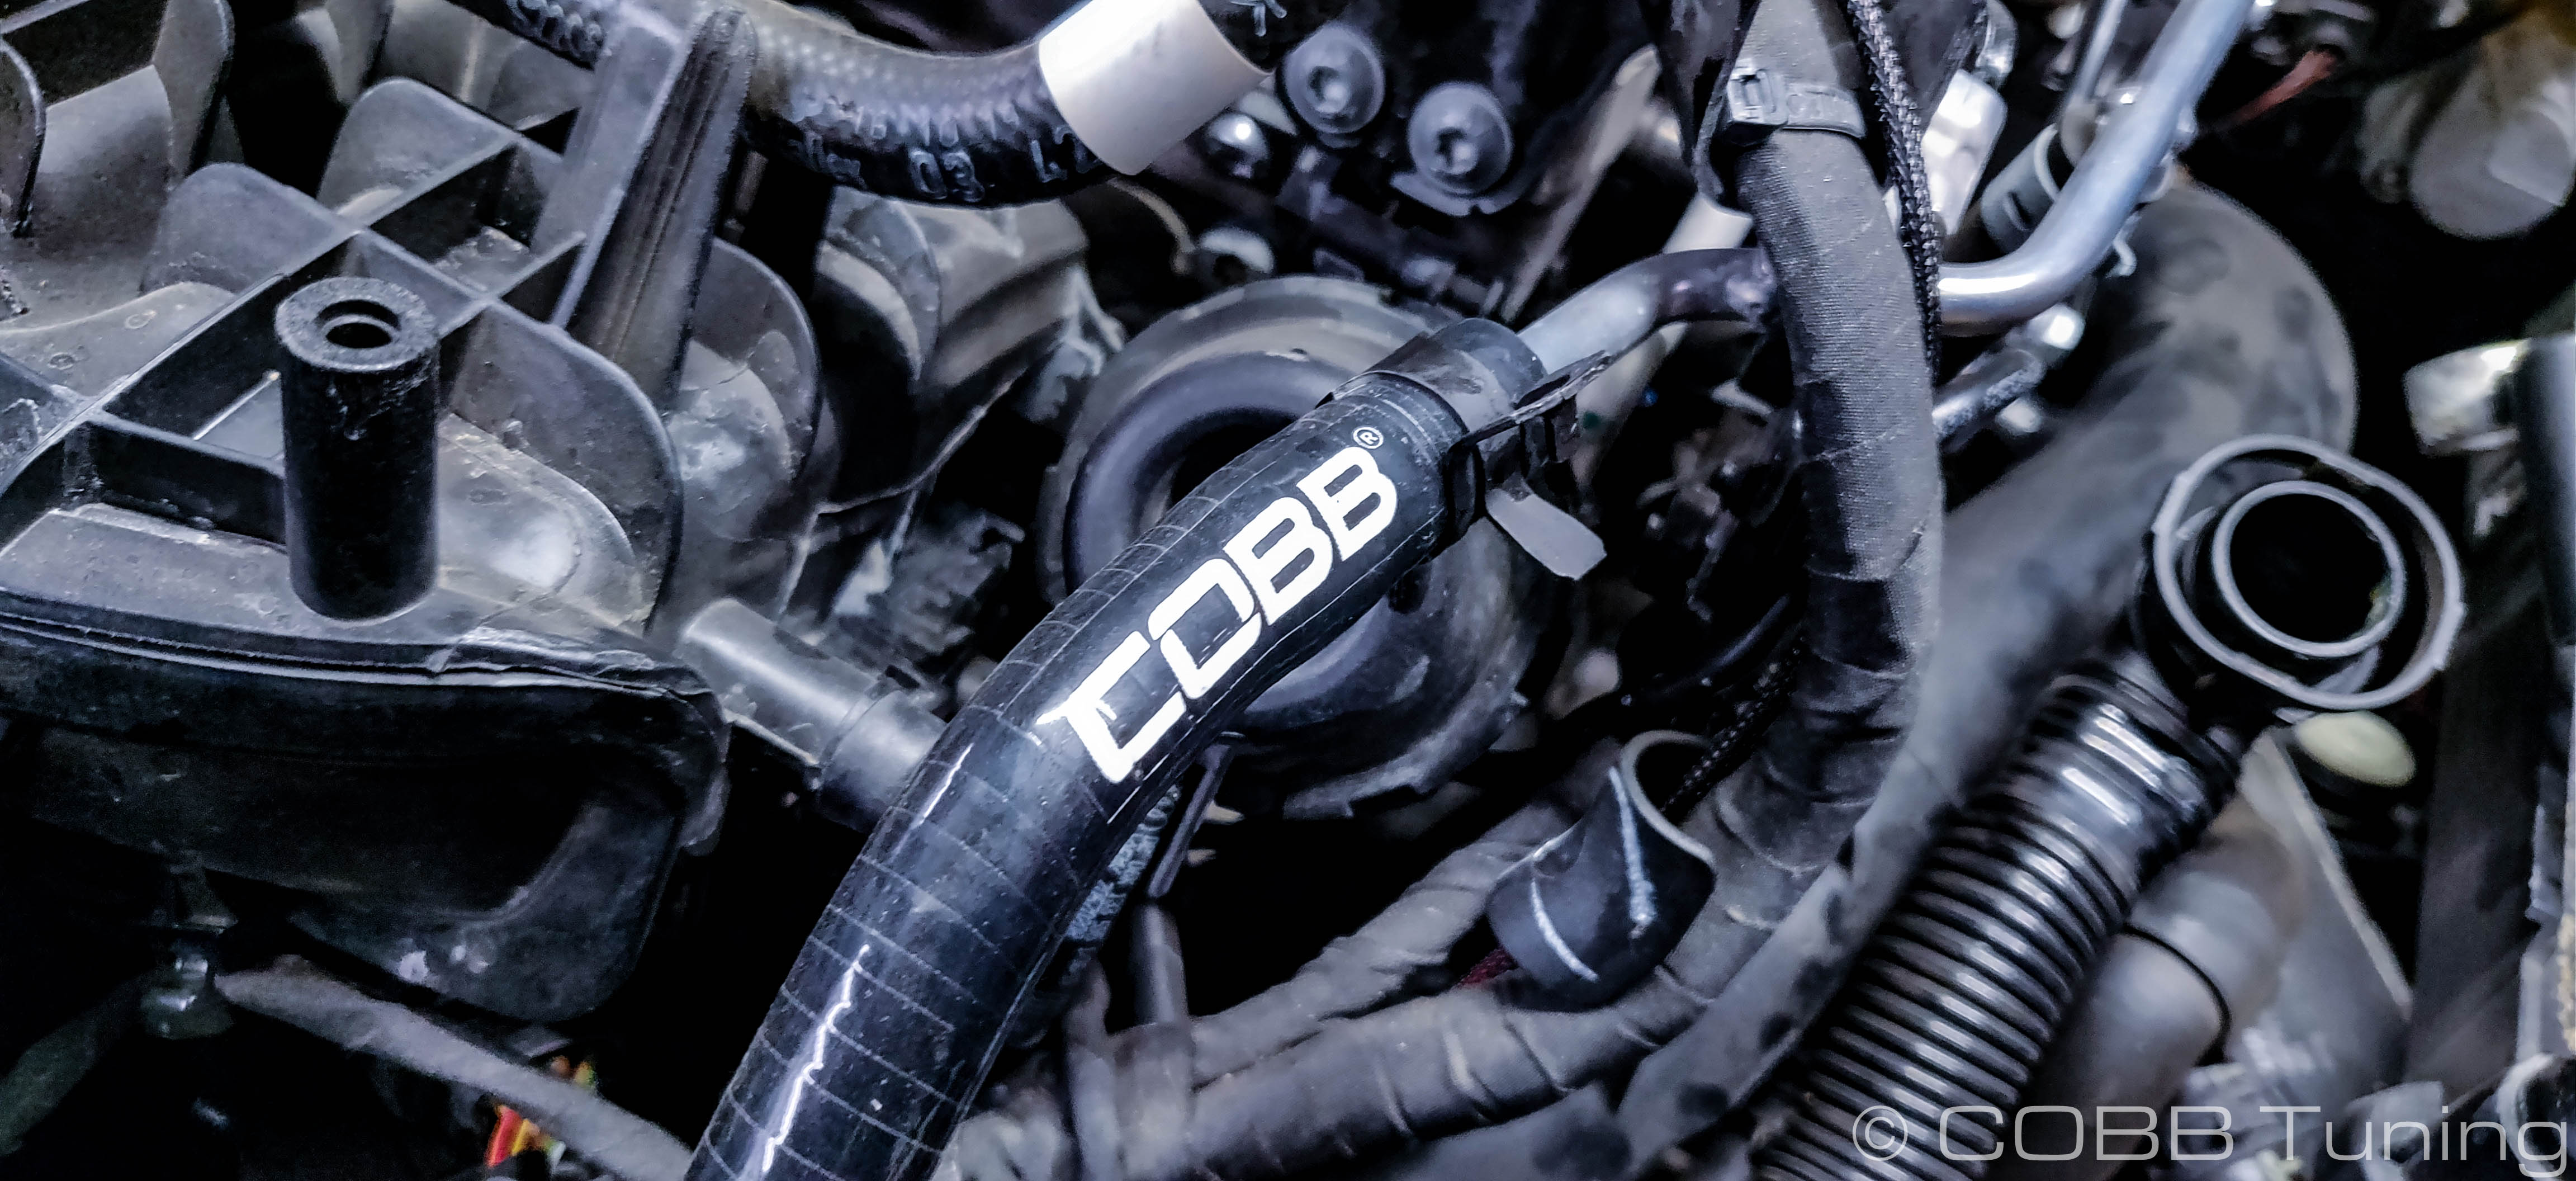
Pre-install the supplied squeeze clamps onto the COBB Hose a little ways up from the ends on the new line using a pair of pliers.
Start off carefully removing the clamped end for the hose on the radiator side. The metal ring is crimped into place. We recommend gently slipping a flat blade screwdriver under the metal ring just a little bit at a time to get side cutters behind it and cut the ring. You can also use a dremel or something else more aggressive but you run the risk of cutting through the line into the plastic fitting on the radiator hose. It’s also important to not wiggle or force the fitting too much as it can snap off and you’ll need to buy an entirely new radiator hose.
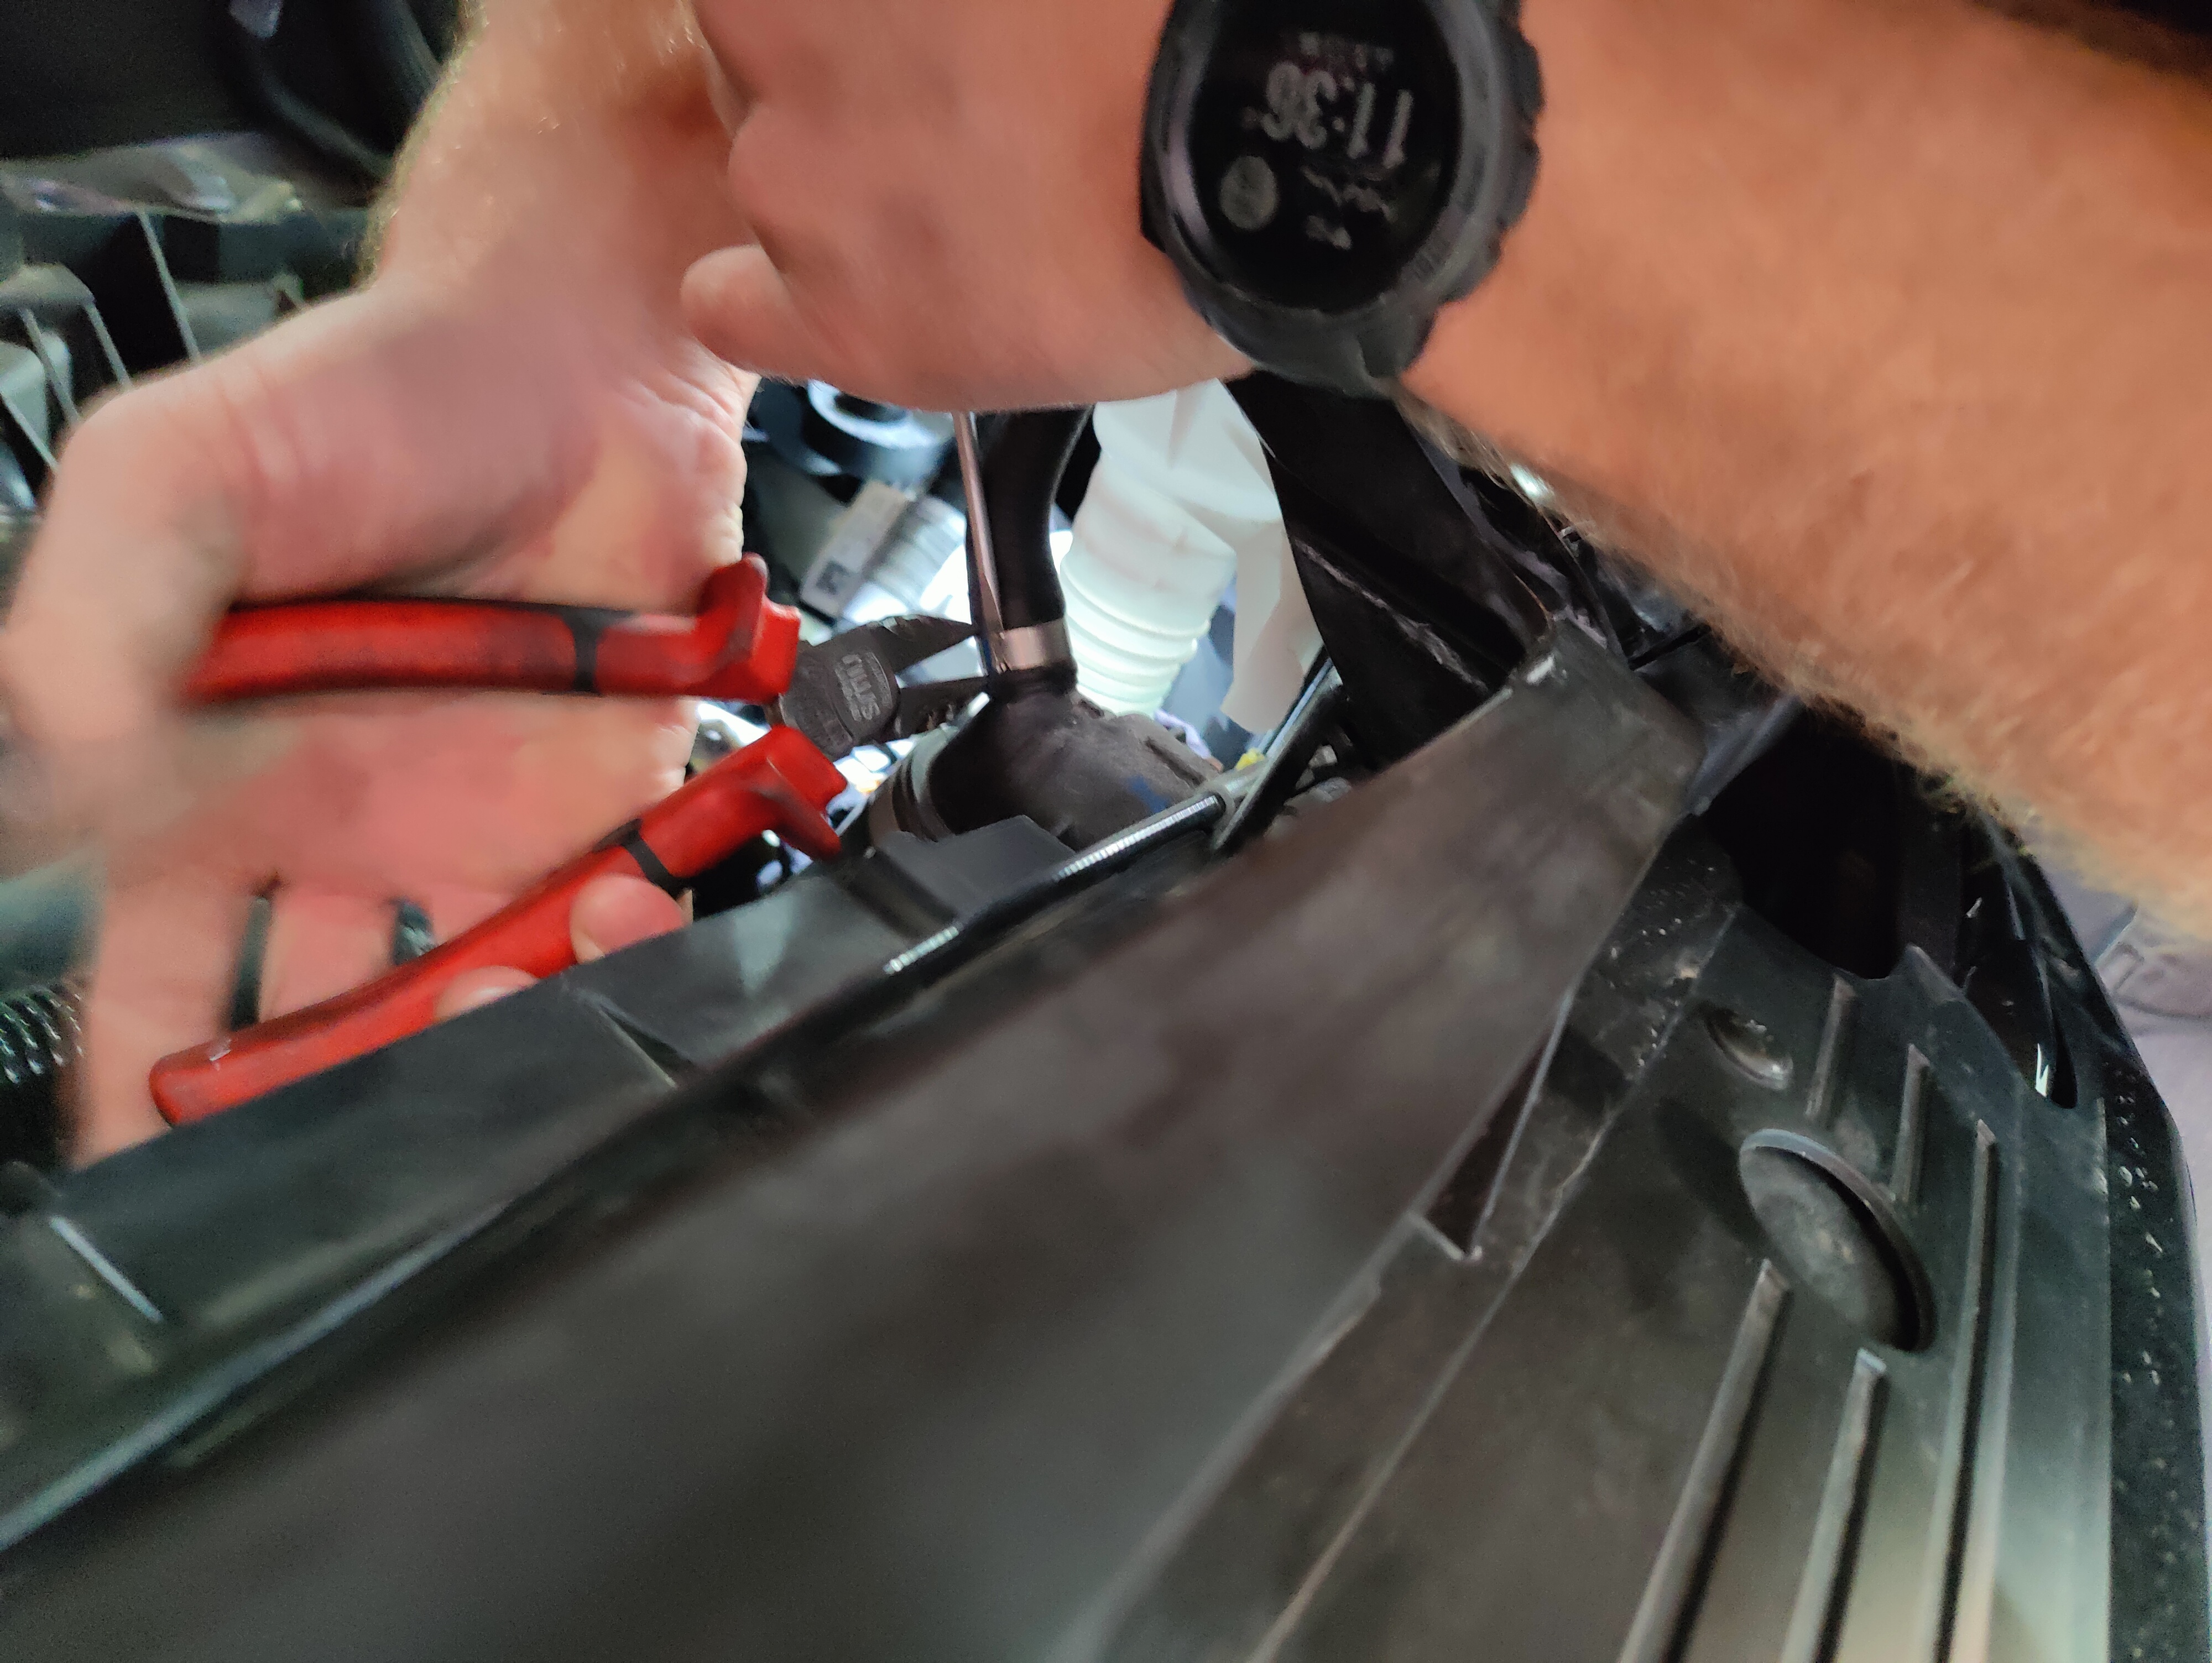
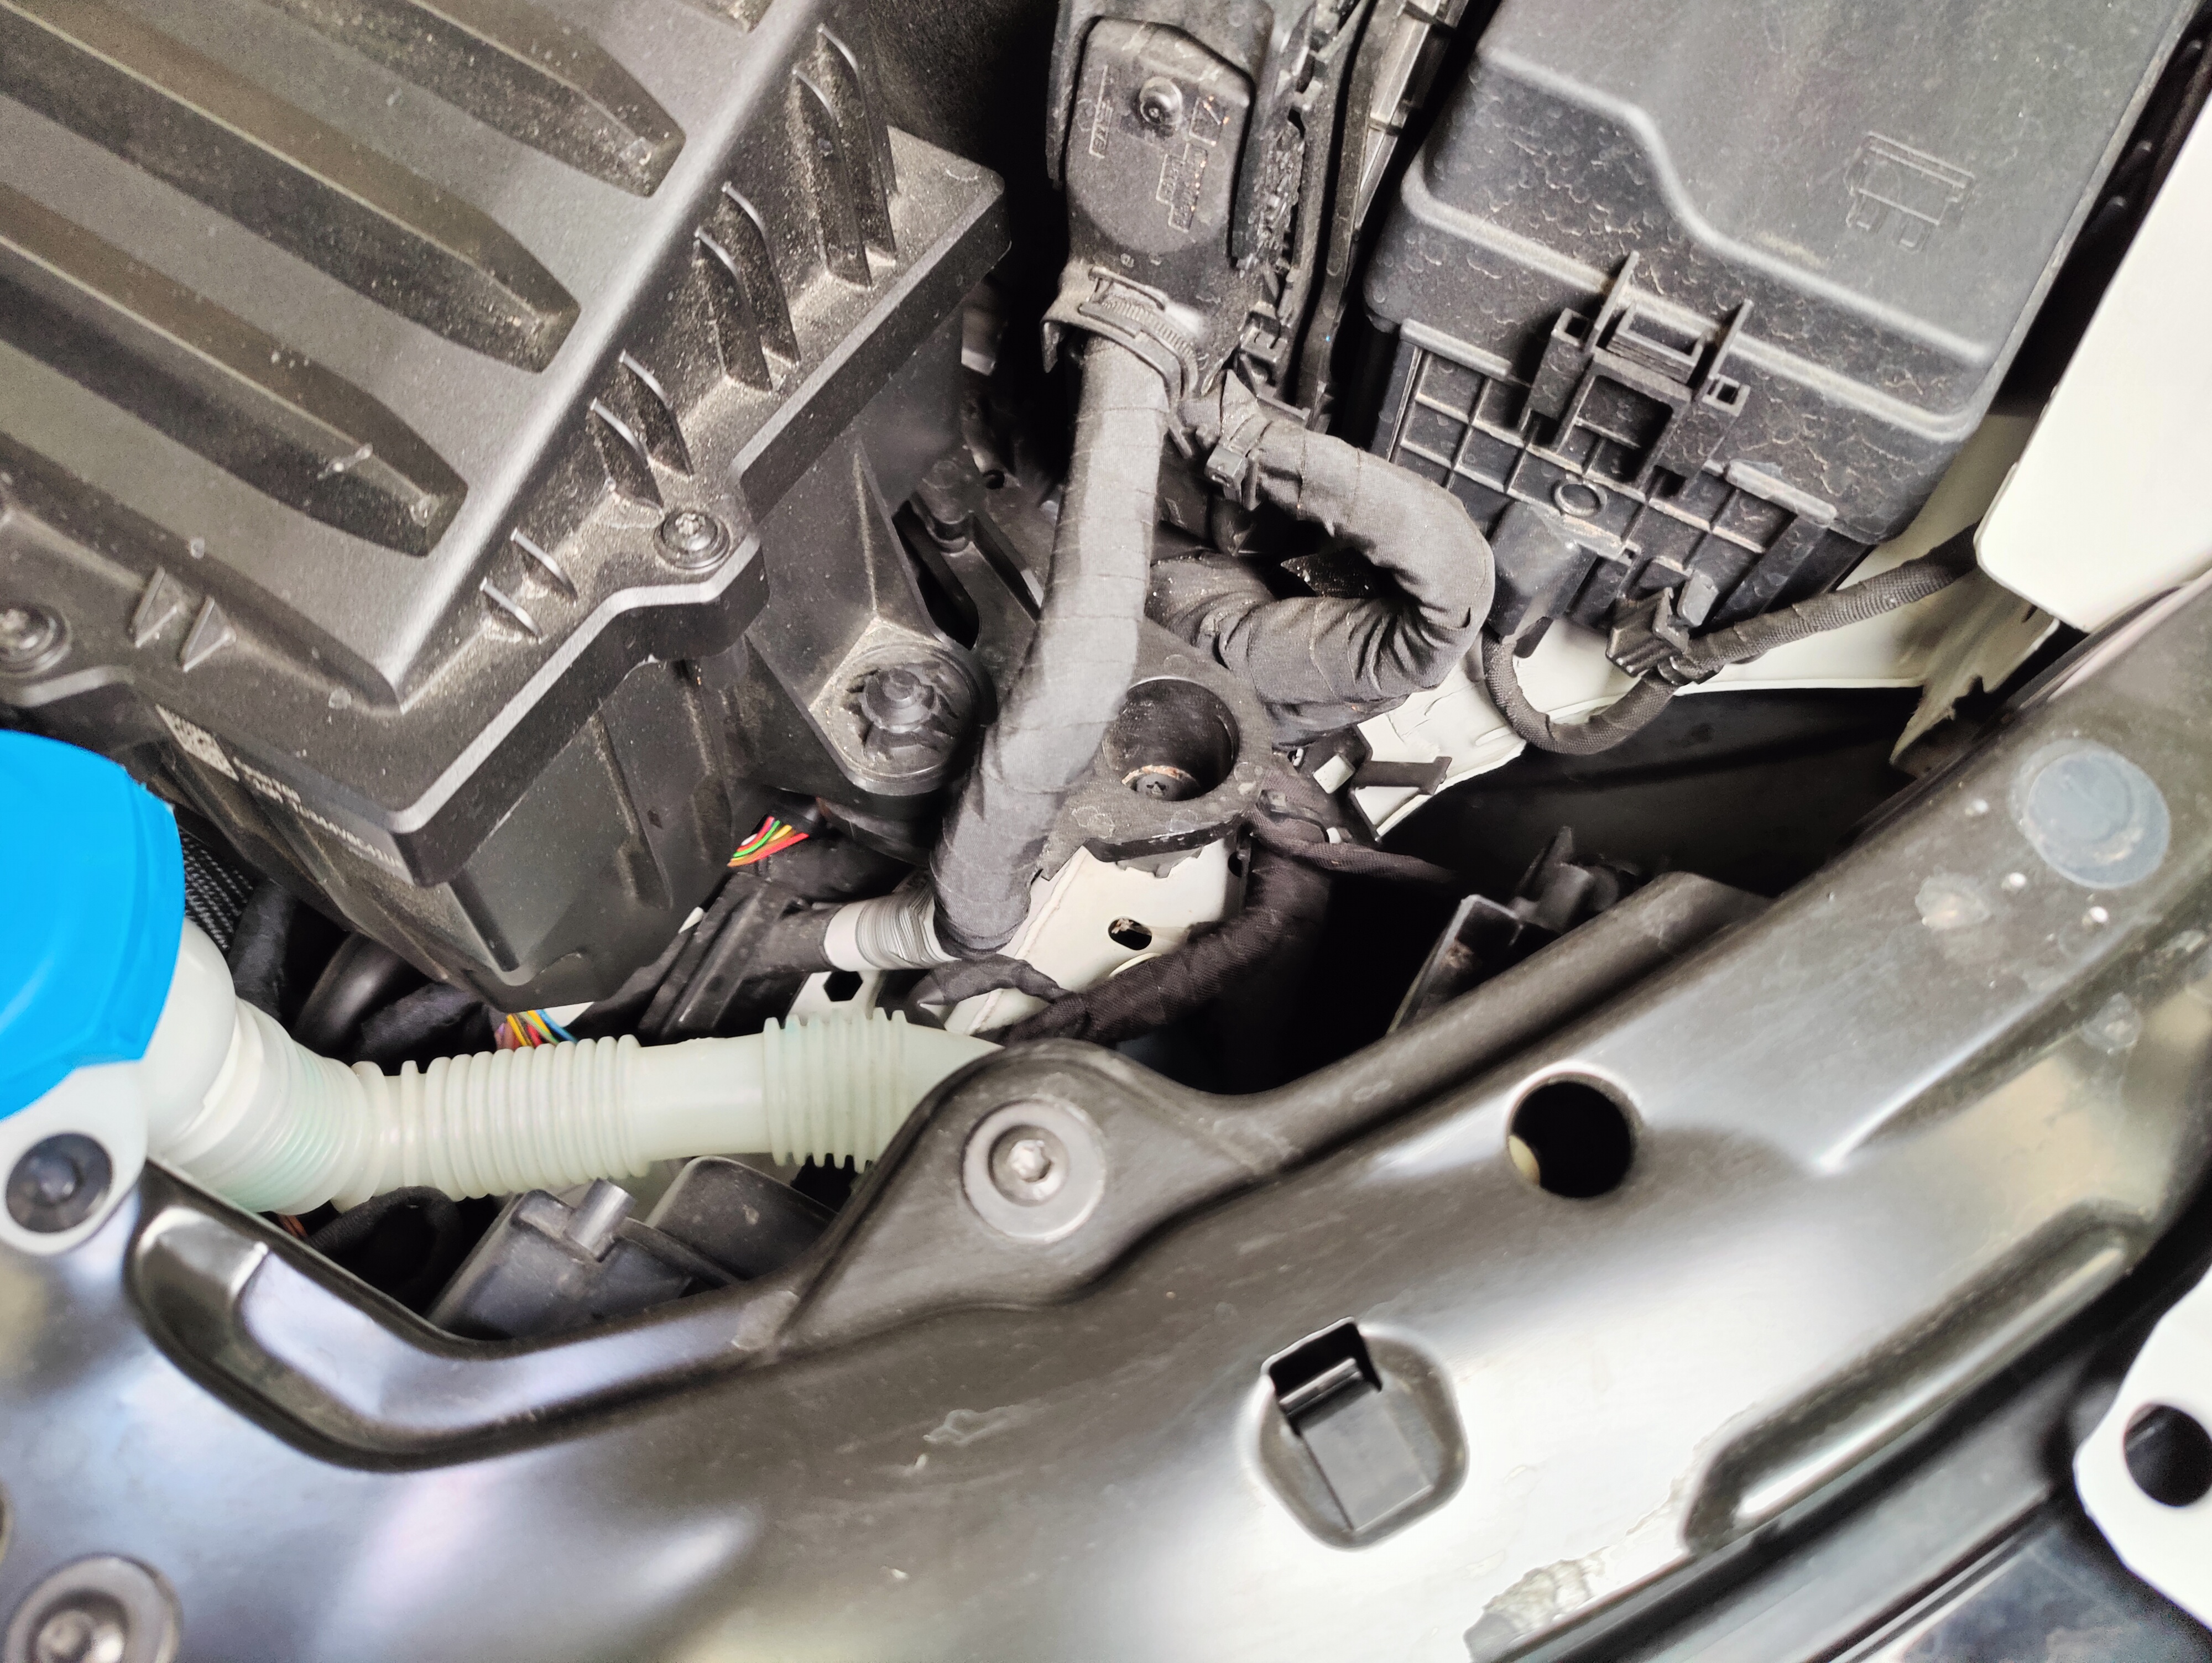
We recommend removing the line from the engine side first, as this allows a bit more room to catch the spills from the hose and metal tube. Remove the clamp with pliers and pull the hose off the line.
Replace that end with the COBB hose. This way you can quickly swap the other end.
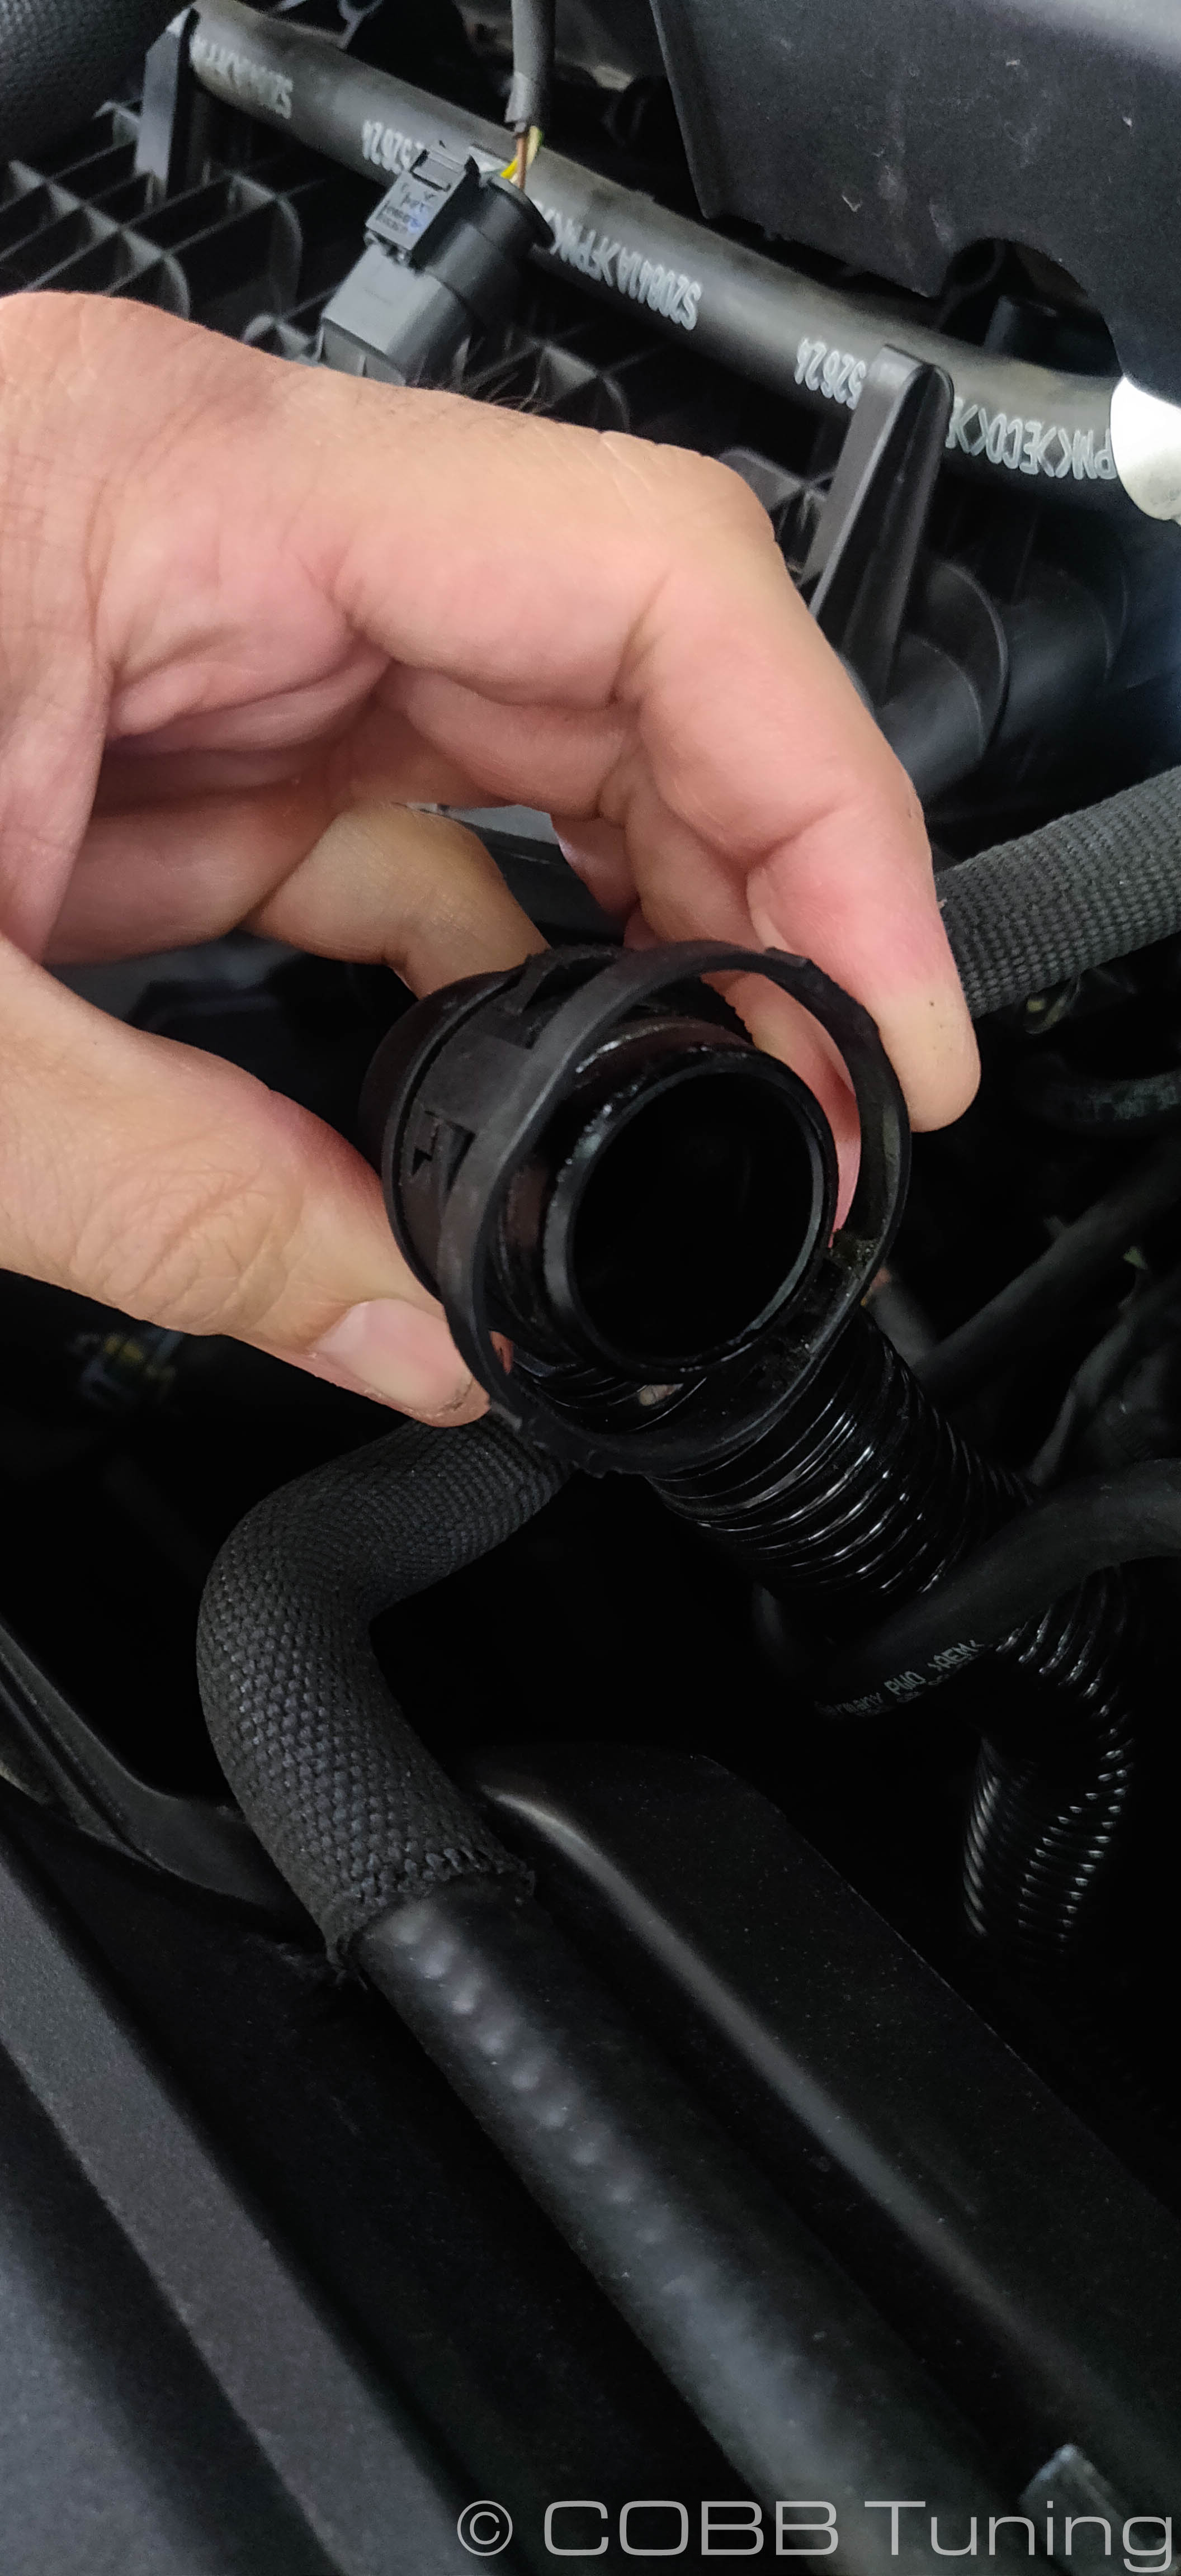
Once that's done you can move to the end where you removed the clamp earlier. Gently spin the line to break it free from the radiator hose, be careful as the connection is plastic and may be brittle if the vehicle is older. Once done you can pull off that end of the line and do your best to minimize spills while quickly installing the new line onto the radiator hose. Any Indiana jones references you make while doing so earn double points.
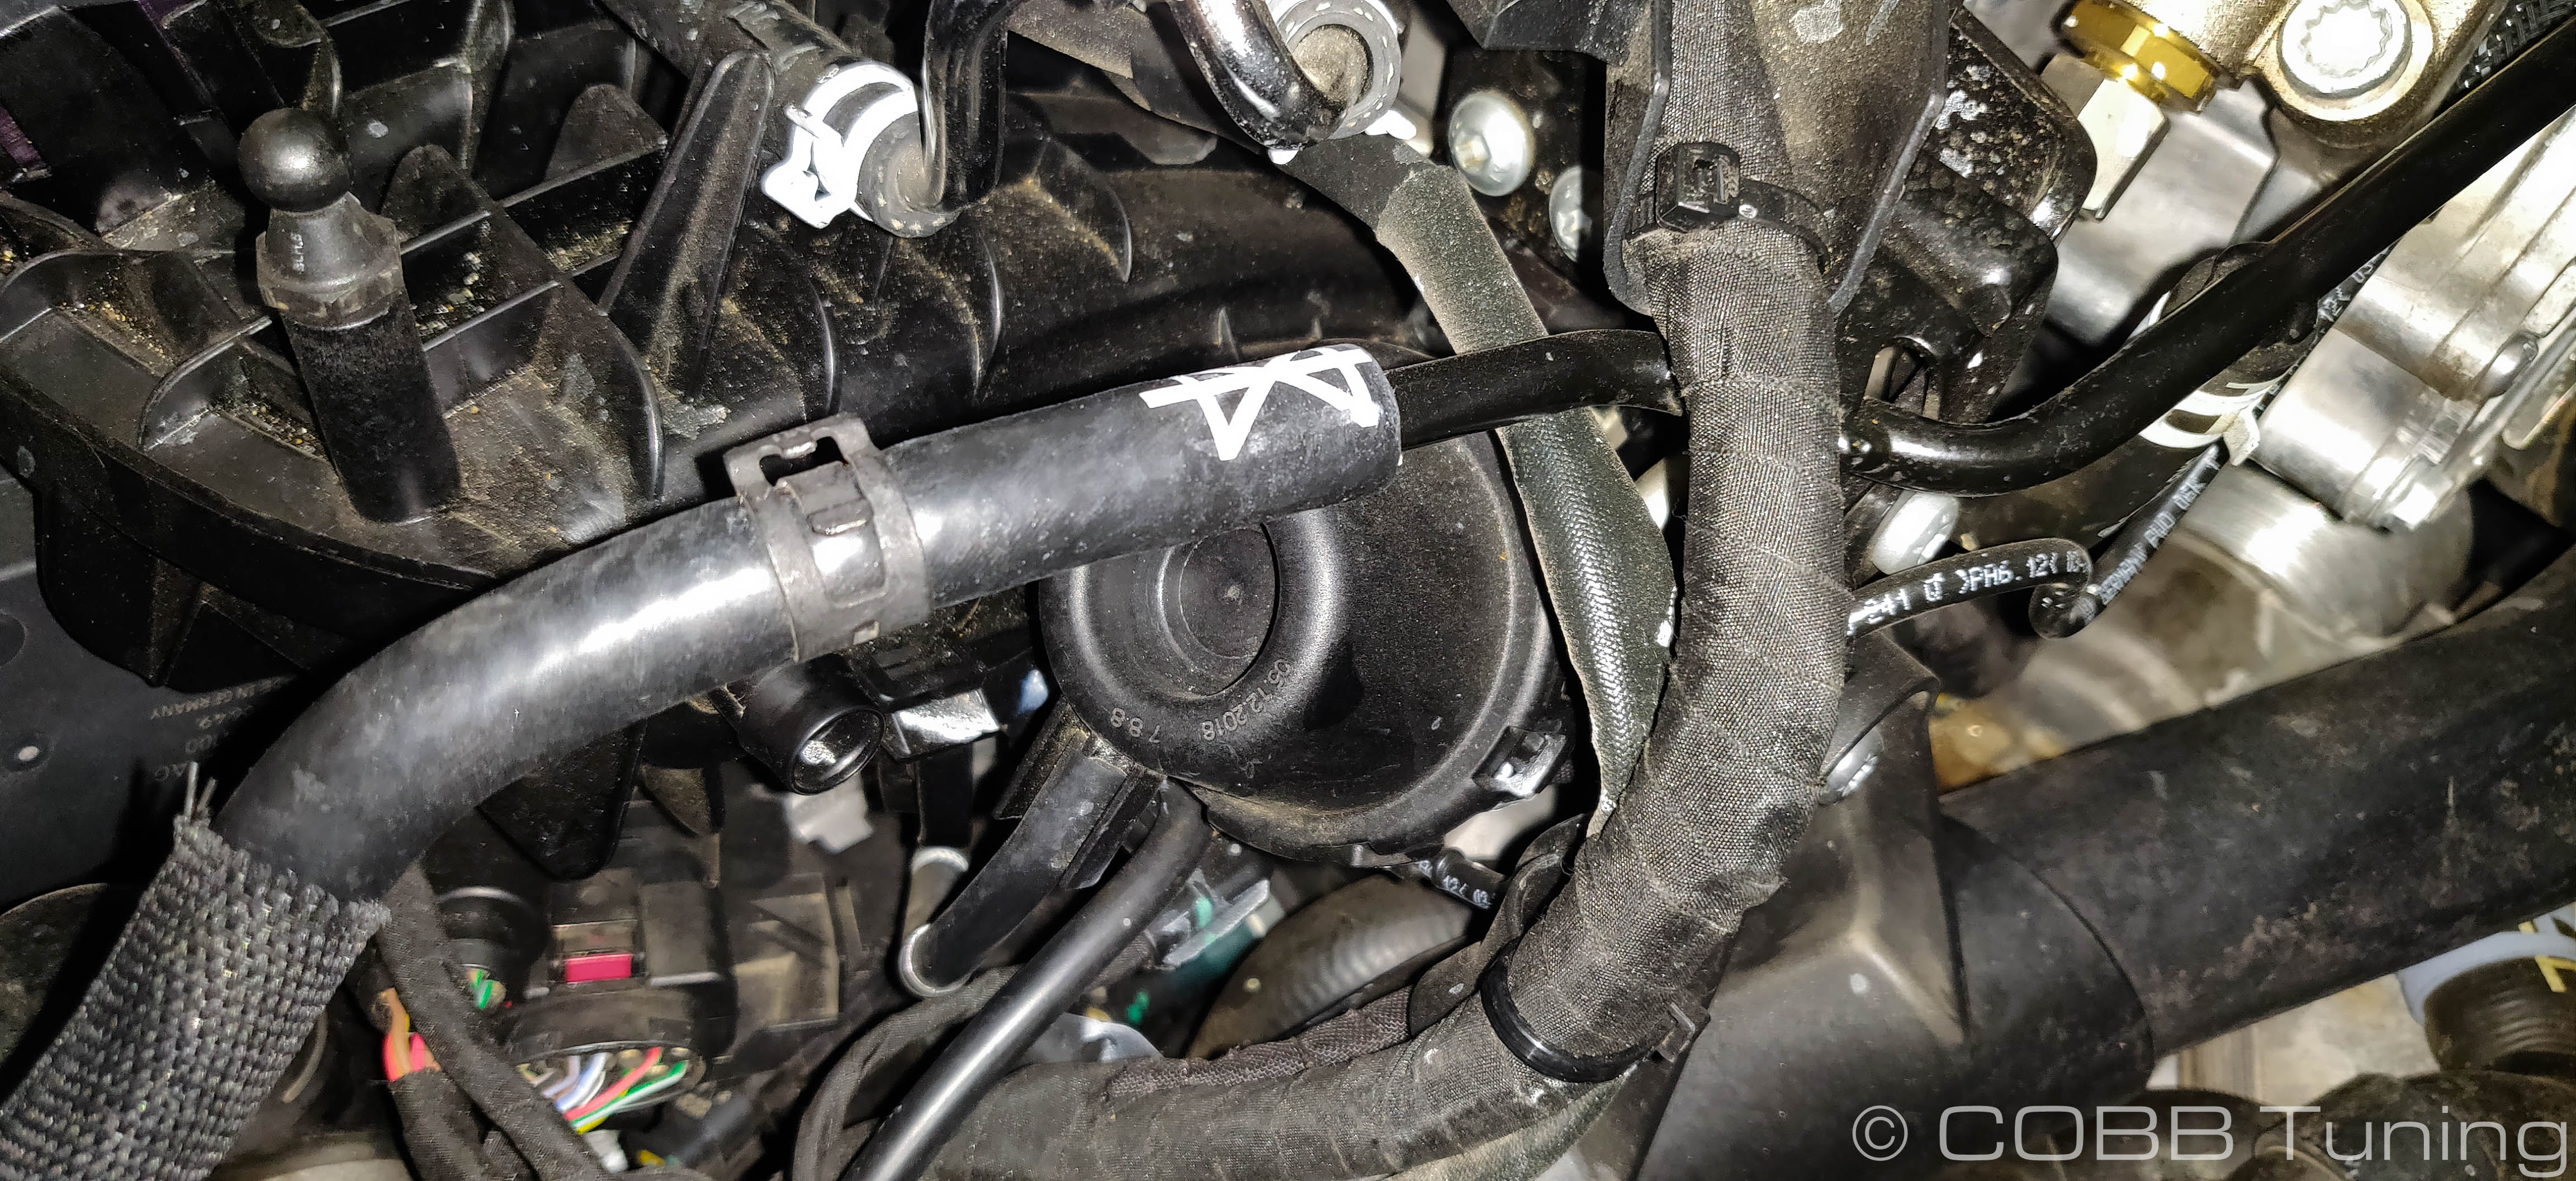
You should now be free to install the other end and secure with the provided spring clamp.
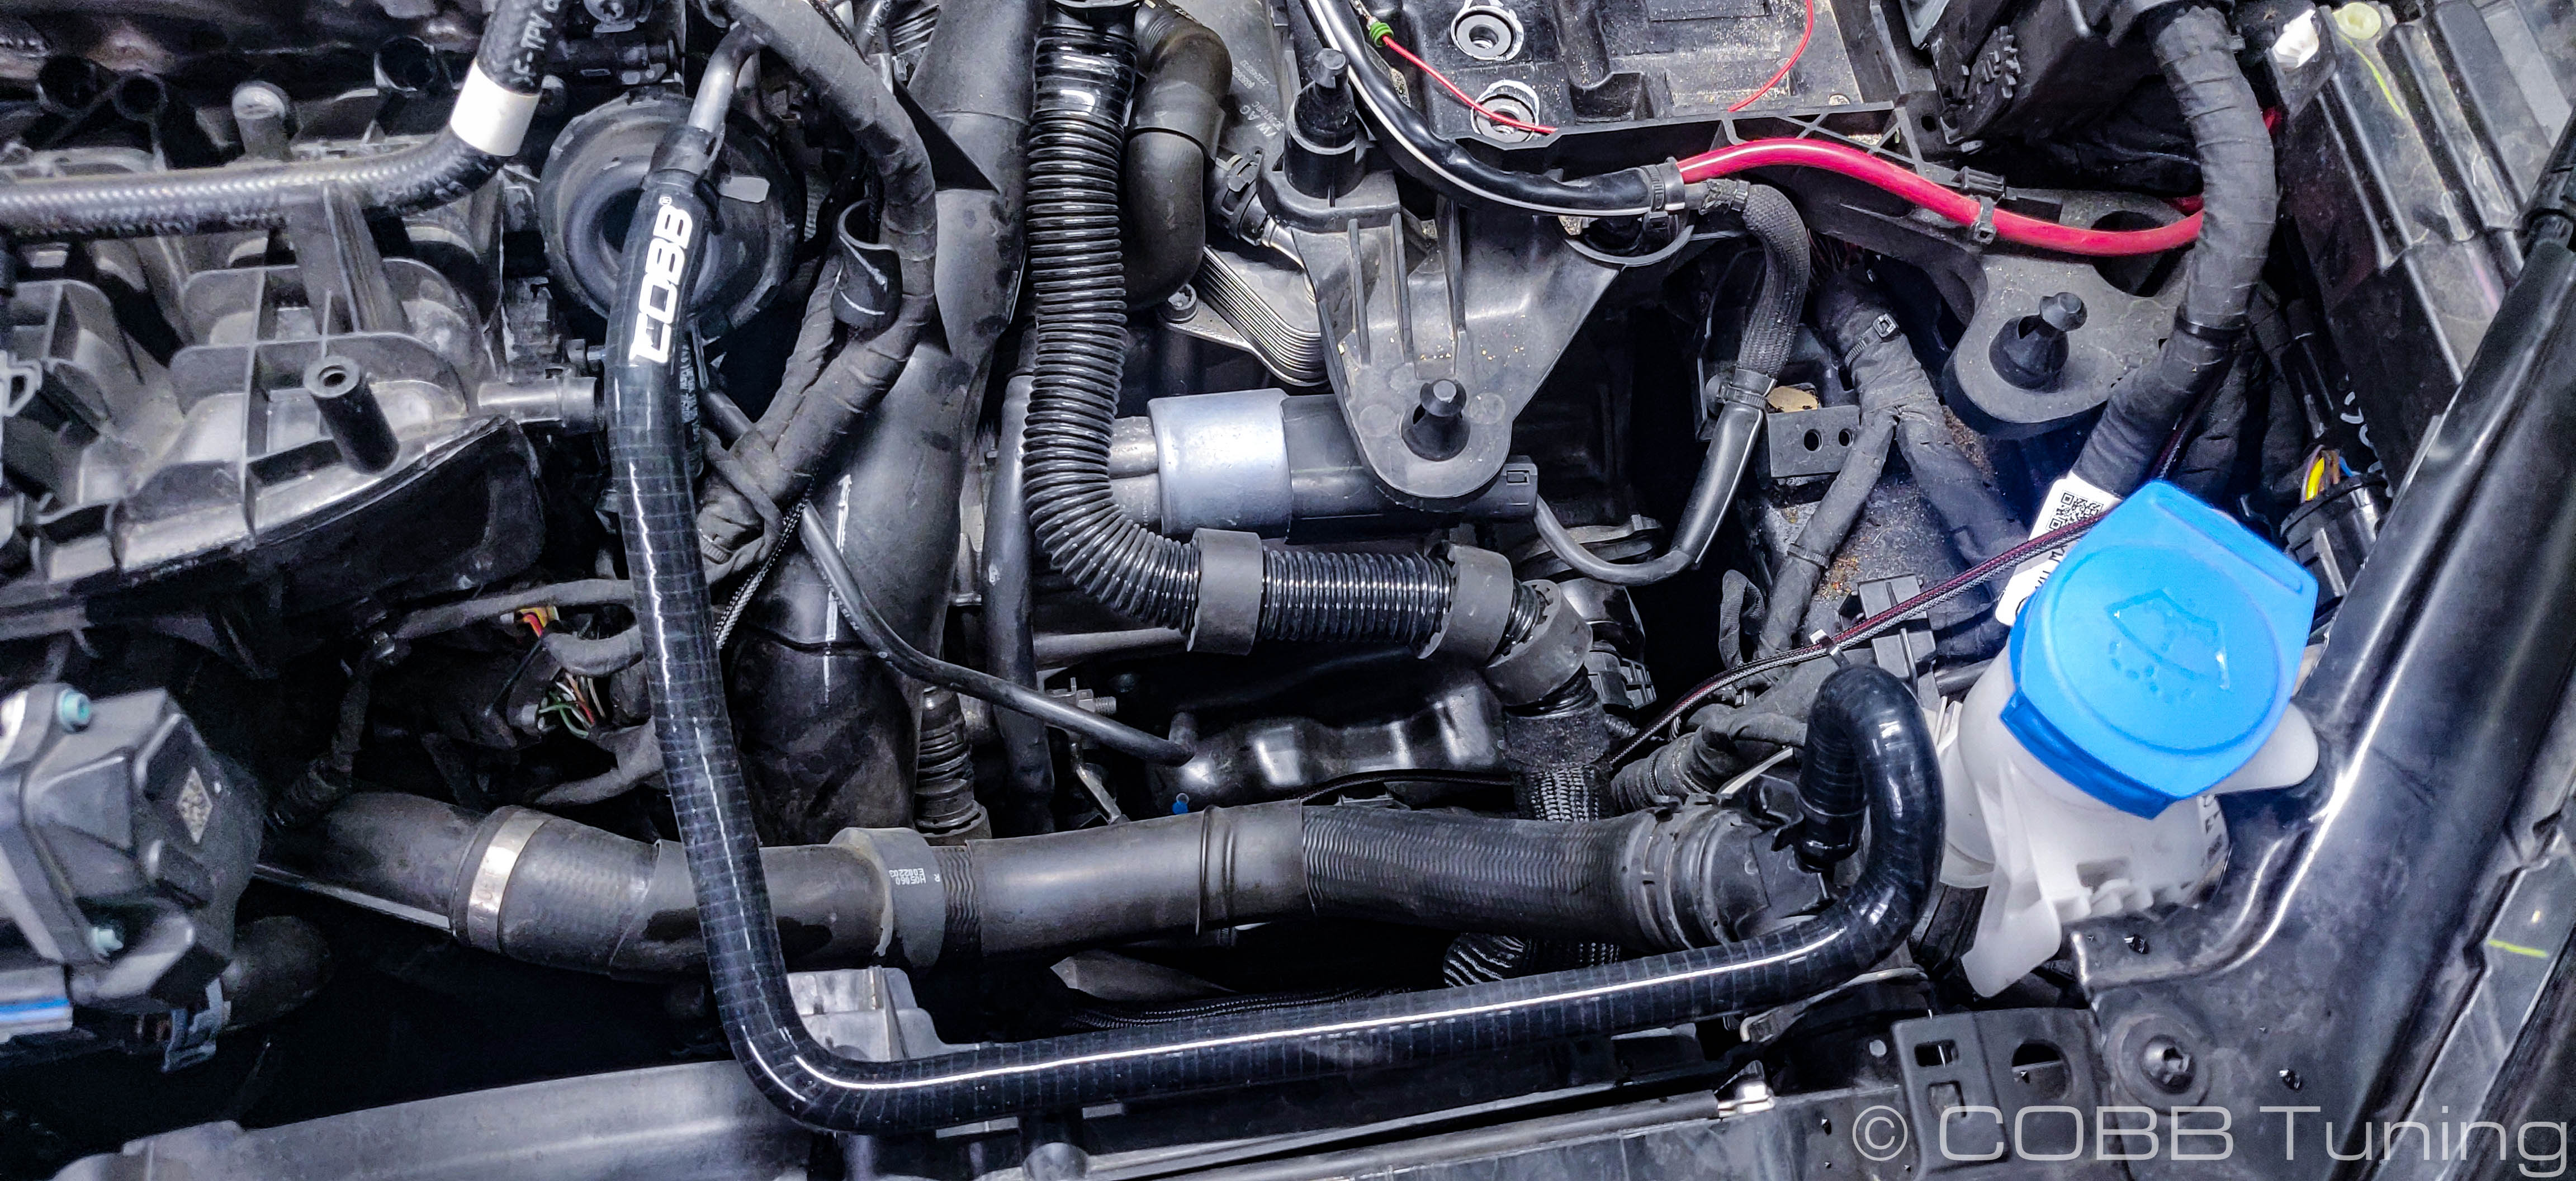
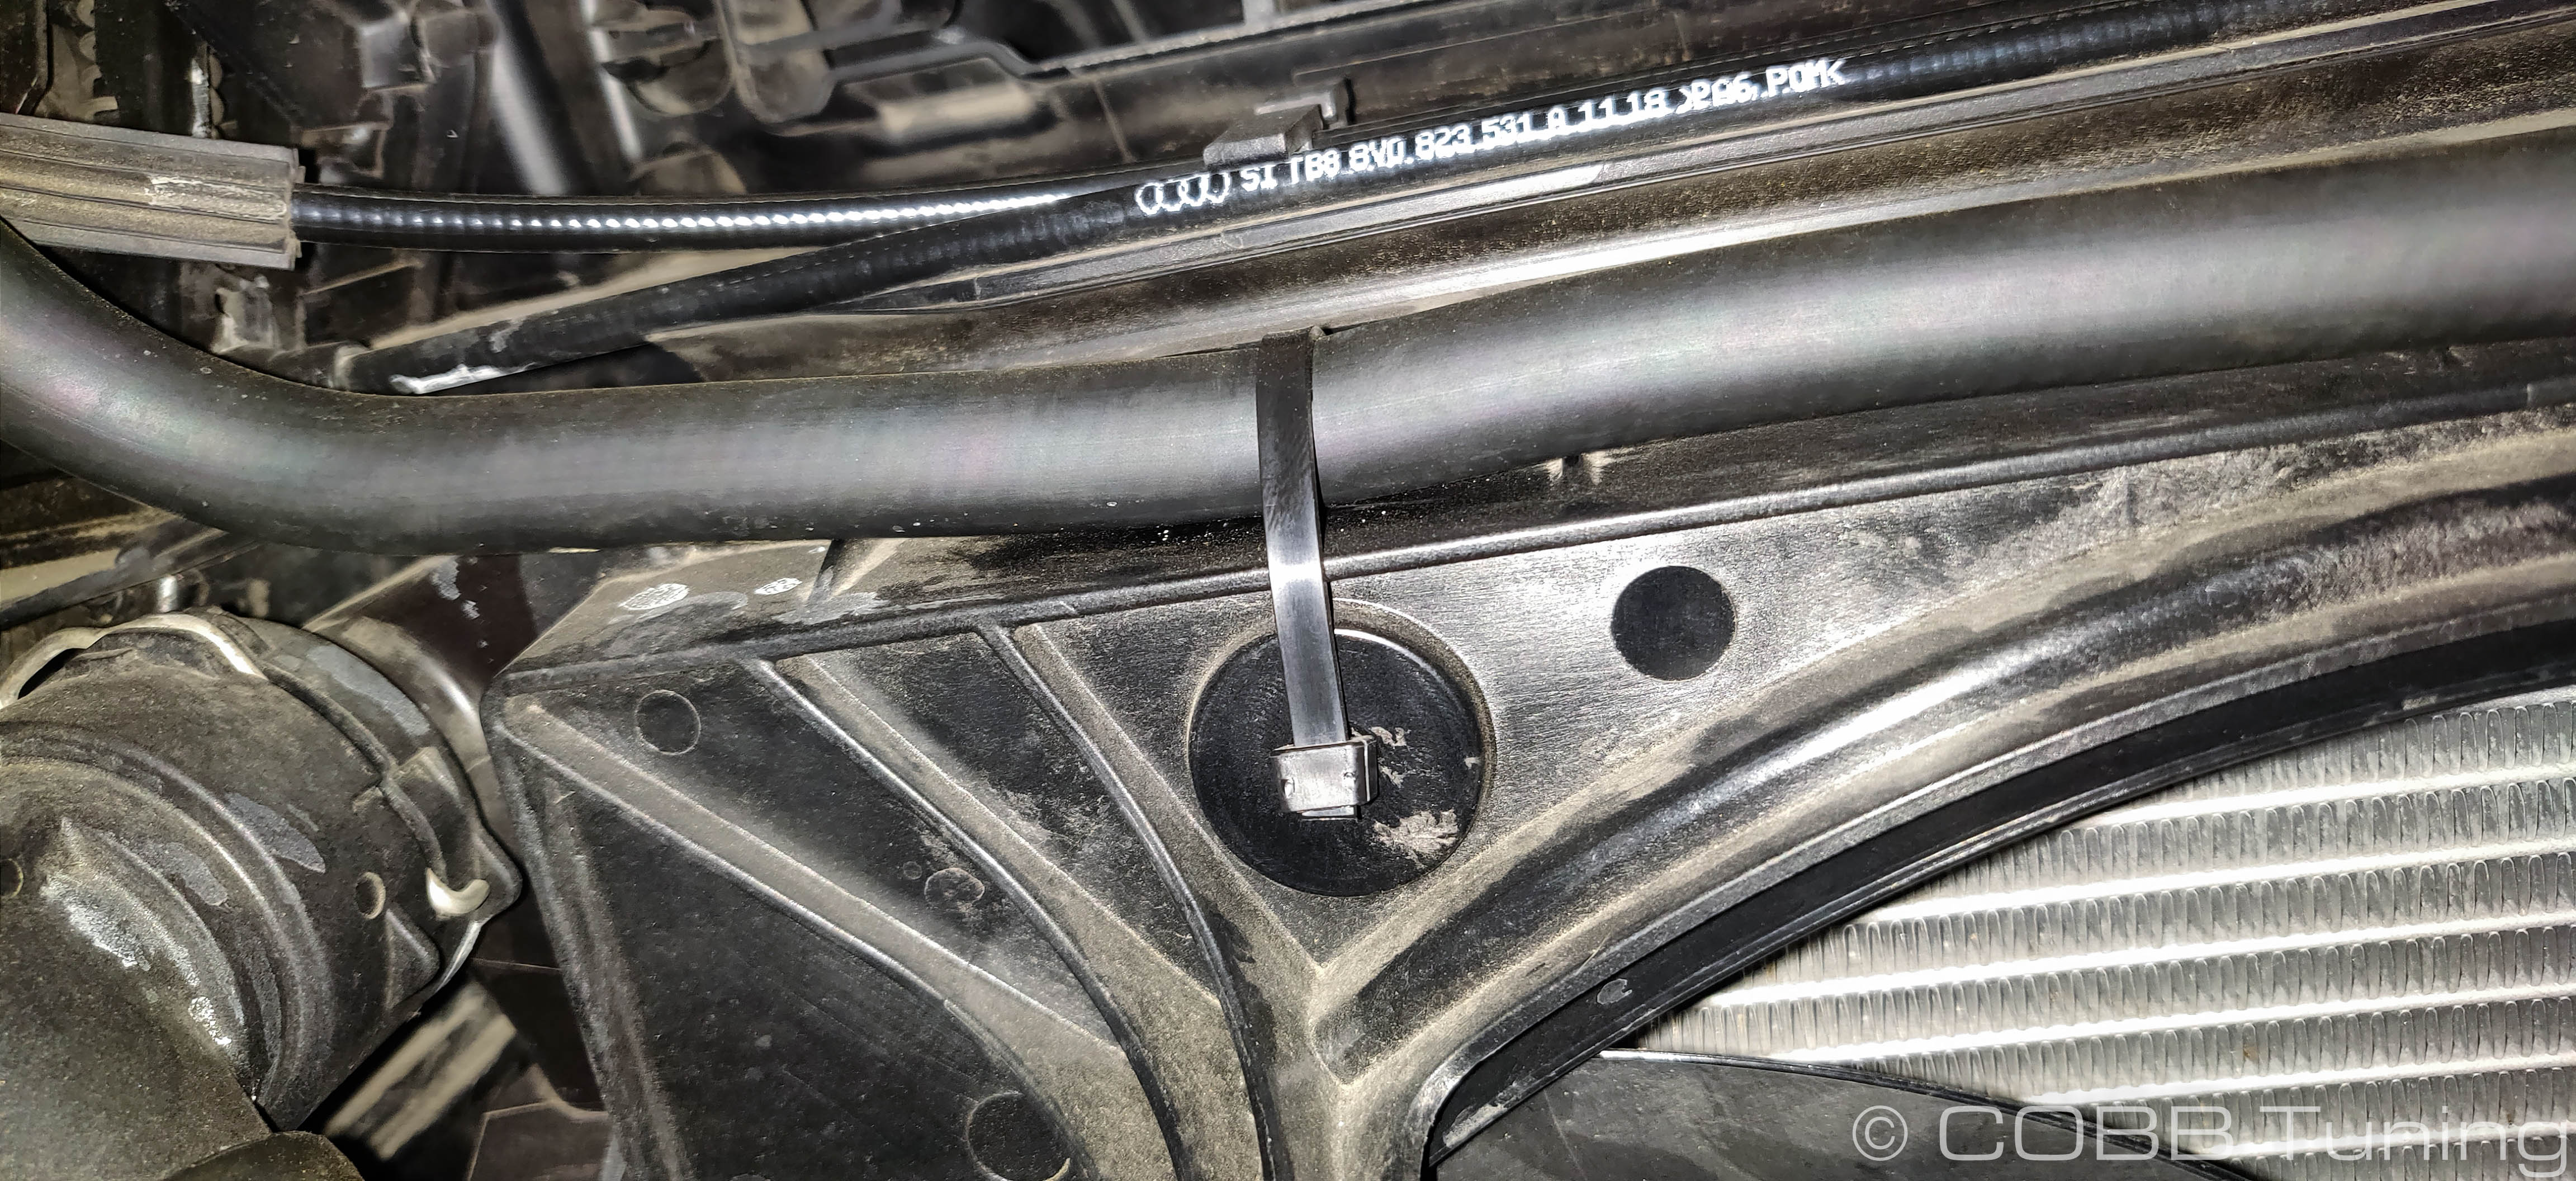
Making sure to keep it away from the blades, use the zip tie to attach the new line to the fan shroud. There is a small hole in some models that make this a little easier, make sure to cut off the excess.
You can now re-install the intake. Afterward refill your coolant level if necessary. (you may want to check your coolant level after you drive the car for the first time and allow it to cool down)
CARB Sticker Application
(Where Applicable)
Apply the supplied CARB sticker in a clear, easy to find location. Typically underhood, or on the radiator core support.